
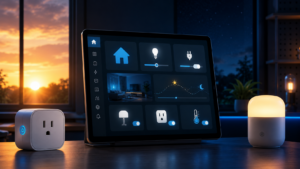

I use Home Assistant to bring devices from different ecosystems into one place, and Tuya devices are a good example of why that is useful.
Rather than relying entirely on the Smart Life or Tuya app, the device can be added to Home Assistant and then controlled alongside the rest of the Realm Labs automation setup.
In this guide I’ll add a Tuya device to Home Assistant, create a simple dashboard control and then automate it using sunrise and sunset events.
Adding Tuya to Home Assistant
Home Assistant includes an official Tuya integration, so the first step is linking your Smart Life or Tuya Smart account.
Find your Tuya user code
Open the Smart Life or Tuya Smart app on your phone.
Go to:
Me → Settings → Account and Security
Locate the User Code shown for your account.
You’ll need this when linking Home Assistant.
Add the Tuya integration
In Home Assistant go to:
Settings → Devices & Services
Select:
Add Integration
Search for:
Tuya
Enter the User Code from the Smart Life or Tuya Smart app when prompted.
Home Assistant will then display a QR code.
Open the Tuya or Smart Life app and use:
+ → Scan
Scan the QR code shown by Home Assistant and confirm the connection.
Once linked, supported Tuya devices should appear automatically in Home Assistant as entities.
Depending on the device, these may look something like:
switch.living_room_plug
light.patio_light
At this point the device can be used like any other Home Assistant entity.
Adding the Device to a Dashboard
For quick manual control, I normally add the device directly to a Home Assistant dashboard.
Open the dashboard you want to use and select:
Edit Dashboard → Add Card
Choose either a Button or Tile card.
Select the Tuya entity and set the tap action to:
Toggle
Save the card.
You now have a simple on/off control without needing to open the Smart Life app.
Using a Physical Button
A Tuya device can also be controlled from another physical button or remote connected to Home Assistant.
For example, a Zigbee button could be used to toggle a Tuya smart plug.
A basic automation could look like this:
alias: Button - Toggle Tuya Plug
description: Toggle Tuya plug on physical button press

trigger:
  - platform: device
    domain: button
    device_id: YOUR_PHYSICAL_BUTTON_DEVICE_ID
    type: pressed

action:
  - action: switch.toggle
    target:
      entity_id: switch.tuya_socket
Replace the device ID and entity name with the devices used in your own Home Assistant installation.
The important part is that Home Assistant acts as the common automation layer.
The button and the Tuya device do not need to come from the same manufacturer.
Automating a Tuya Device at Sunset
One of the reasons I wanted the device inside Home Assistant was to automate it using the sun rather than a fixed clock time.
Home Assistant already tracks sunrise and sunset for the configured location, which means the automation adjusts throughout the year.
This is much more useful for lighting than setting something like 18:00 and continually changing it as the seasons change.
Creating it in the Home Assistant interface
Go to:
Settings → Automations & Scenes
Create a new automation.
For the trigger choose:
Sun
Then select either:
Sunset
or:
Sunrise
Home Assistant also allows an offset.
For example:
-00:30:00would trigger the automation 30 minutes before sunset.
For the action, choose the appropriate service for the device, such as:
Light: Turn onor:
Switch: Turn onThen select the Tuya entity.
Sunset and Sunrise Automation in YAML
For a device that should turn on shortly before sunset and switch off again at sunrise, the automation can also be created directly in YAML.
This example turns the device on 15 minutes before sunset and turns it off at sunrise:
alias: Solar Control - Tuya Device
description: Turn on Tuya device before sunset and off at sunrise
mode: single

trigger:
  - trigger: sun
    event: sunset
    offset: "-00:15:00"
    id: turn_on_event

  - trigger: sun
    event: sunrise
    offset: "00:00:00"
    id: turn_off_event

action:
  - choose:
      - conditions:
          - condition: trigger
            id: turn_on_event
        sequence:
          - action: switch.turn_on
            target:
              entity_id: switch.tuya_socket

      - conditions:
          - condition: trigger
            id: turn_off_event
        sequence:
          - action: switch.turn_off
            target:
              entity_id: switch.tuya_socket
Again, replace switch.tuya_socket with the actual entity ID shown in Home Assistant.
Why Use Home Assistant Instead of the Tuya App?
The Tuya application can already create schedules and basic automations, but bringing the device into Home Assistant removes the need to keep each ecosystem separate.
Once inside Home Assistant, a Tuya device can react to:
- sunrise and sunset
- motion sensors
- MQTT messages
- other smart-home devices
- presence
- temperatures
- network status
- custom scripts
- physical buttons
That flexibility is the main reason I integrate devices into Home Assistant rather than leaving their automation entirely inside the manufacturer’s app.
A Note About Local Tuya Control
The official Home Assistant Tuya integration relies on Tuya’s platform for communication.
For devices where local control is important, there are community integrations such as LocalTuya and Tuya Local that can communicate directly with compatible devices over the local network.
I would only move to local control where there is a real reason to do so, as the official integration is considerably easier to configure and maintain.
The Result
Once the Tuya device is available in Home Assistant it stops feeling like a standalone smart device.
It becomes another entity that can participate in the wider automation environment.
For this setup, the end result is simple: the device can be controlled manually from the dashboard, triggered by another physical device, and automatically switched using sunrise and sunset without maintaining fixed schedules throughout the year.
That is exactly the sort of integration Home Assistant is useful for.