
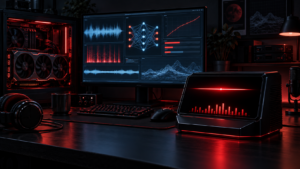

KARR already had a local language model, memory, a custom web interface and the red voice display that gave the assistant its character. The missing piece was the voice itself. A normal text-to-speech voice worked technically, but it never sounded as though it belonged to the same machine.
I therefore trained a custom voice model with Piper TTS, using Windows 11, WSL Ubuntu 22.04 and the NVIDIA GTX 1080 Ti in my RACING-RIG. The finished experiment produced a working 61 MB ONNX model that could run locally without sending speech to a cloud service.
This was a proof of concept, not a polished commercial voice. The dataset contained only 20 short utterances. That was enough to prove the complete training and export path, but not enough to capture every pronunciation, emotion or sentence shape consistently.
Project note: KARR and Knight Rider are referenced as inspiration for an unofficial fan-built technical experiment. This article documents the local TTS training workflow; it does not provide source recordings, a training dataset or a downloadable character voice model. Realm Labs is not affiliated with or endorsed by the rights holders.
The project goal
The target was a voice with the cold, deliberate character I associated with KARR and HAL-style machine speech, while keeping the entire pipeline local. I wanted to understand the process rather than download another finished voice and call the job complete.
- Prepare my own labelled audio dataset.
- Use GPU acceleration under WSL.
- Resume from an existing English Piper checkpoint instead of training from nothing.
- Export the trained checkpoint into an ONNX model.
- Generate test WAV files locally.
- Eventually connect the voice to my existing KARR local AI assistant.
Training hardware and software
| Host | RACING-RIG |
|---|---|
| Operating system | Windows 11 with WSL Ubuntu 22.04 |
| GPU | NVIDIA GTX 1080 Ti, 11 GB VRAM |
| Windows driver | 581.80 during this experiment |
| Reported CUDA level | CUDA 12.1 through the installed driver |
| Training framework | Piper training tools and PyTorch |
| Audio | Single speaker, 22,050 Hz |
| Dataset | karr_piper_dataset_v01, 20 utterances |
The 1080 Ti may be an older GPU, but its 11 GB of VRAM made it a useful training card. The important part was not the CUDA version displayed by the Windows driver; it was whether the exact PyTorch build inside the Linux environment could see and use the GPU.
Confirming the GPU inside WSL
From Ubuntu, I first checked that the Windows NVIDIA driver was exposed to WSL:
nvidia-smiThen I checked PyTorch rather than assuming that a successful nvidia-smi result meant the Python environment was ready:
python3 - <<'PY'
import torch

print("PyTorch:", torch.__version__)
print("CUDA available:", torch.cuda.is_available())
print("CUDA build:", torch.version.cuda)

if torch.cuda.is_available():
    print("GPU:", torch.cuda.get_device_name(0))
PY
The critical result was:
CUDA available: True
GPU: NVIDIA GeForce GTX 1080 Ti
I also ran a simple matrix multiplication on the GPU. That gave me confidence that Python was performing real CUDA work before I started a long training process.
The dependency problem
My first instinct was to use a modern stack built around PyTorch 2.5.1 with CUDA 12.1. The GPU worked, but the Piper training code and the versions of Lightning and TorchMetrics it expected were from an older ecosystem. Newer was not automatically more compatible.
The combination that finally behaved consistently was:
torch           1.13.1+cu117
pytorch-lightning 1.7.7
torchmetrics     0.11.4
numpy            1.24.4
setuptools       70.3.0
This meant moving from the newer PyTorch/CUDA package to the older CUDA 11.7 build expected by the training stack. The installed NVIDIA driver could still run it: the driver’s reported CUDA capability and the CUDA runtime bundled with a PyTorch wheel are related, but they do not have to show the same version number.
Lesson learned: freeze the complete working Python environment once training starts. Updating one library halfway through can break checkpoint loading or produce a subtly different runtime.
Creating an isolated Python environment
I used a virtual environment inside WSL so that the older Piper dependencies did not interfere with unrelated Python projects:
python3 -m venv ~/venvs/karr-piper
source ~/venvs/karr-piper/bin/activate

python -m pip install --upgrade pip
python -m pip freeze > environment-before-training.txt
After resolving the package versions, I recorded the final environment again:
python -m pip freeze > karr-piper-working-environment.txtThat small step matters. An 800 MB checkpoint is much less useful if the exact environment required to open it has been forgotten.
Building the KARR dataset
The first dataset was deliberately small. I created 20 clean utterances and arranged them in an LJSpeech-style structure:
karr_piper_dataset_v01/
├── metadata.csv
└── wavs/
    ├── karr_001.wav
    ├── karr_002.wav
    ├── karr_003.wav
    └── ...
Each line in metadata.csv associates a recording with its transcript:
karr_001|Your systems are functioning within acceptable parameters.
karr_002|I have completed the requested analysis.
karr_003|That outcome was entirely predictable.
The filename and text must agree exactly. Incorrect transcripts teach the model that the wrong sounds belong to the words. Consistent volume, distance, room tone and speaking style are also more valuable than dramatic variation in a tiny dataset.
Why only 20 utterances?
Twenty recordings are not enough for a general-purpose voice. I used them to answer a narrower question: could I get from my own audio, through Piper preprocessing and GPU training, to a working ONNX voice that carried some of the intended character?
Starting small reduced the cost of discovering mistakes. There was no point preparing hundreds of clips before proving that the filenames, transcripts, sample rate, dependencies, checkpoint and export tools all agreed.
Preprocessing for Piper
The dataset used American English, the LJSpeech layout, a single speaker and a 22,050 Hz sample rate. The preprocessing stage was equivalent to:
python3 -m piper_train.preprocess --language en-us --input-dir ./karr_piper_dataset_v01 --output-dir ./karr_piper_dataset_v01-preprocessed --dataset-format ljspeech --single-speaker --sample-rate 22050 --max-workers 4Preprocessing converts the audio and transcripts into the format used during training. I treated warnings about missing files, transcript parsing and sample-rate mismatches as dataset faults rather than something to ignore.
Before training, I checked that:
- All 20 metadata entries had a matching WAV file.
- No recording was empty or clipped.
- The sample rate was consistent.
- The generated configuration described one speaker.
- The processed output contained the expected cache and training data.
Starting from the Lessac checkpoint
Training from a pre-trained English voice gave the experiment a usable starting point. I resumed from the medium-quality Lessac checkpoint rather than asking 20 recordings to teach pronunciation and voice characteristics from zero.
This is transfer learning: the starting model already understands a great deal about converting English text into speech, and the new dataset nudges it towards the target voice. With such a small dataset, traces of the base voice and uneven pronunciation are expected.
The training command
The working training run used the GPU, one device, a batch size of eight, 32-bit precision and checkpoints every 25 epochs:
python3 -m piper_train --dataset-dir ./karr_piper_dataset_v01-preprocessed --accelerator gpu --devices 1 --batch-size 8 --validation-split 0.0 --num-test-examples 0 --max_epochs 10000 --resume_from_checkpoint ./lessac-medium.ckpt --checkpoint-epochs 25 --precision 32The exact command can vary with the Piper training revision, but these were the important choices in my run.
Why batch size 8?
It fitted comfortably within the 1080 Ti’s 11 GB VRAM and avoided trying to optimise a proof of concept prematurely. A larger batch is not automatically a better voice.
Why 32-bit precision?
Precision 32 was the conservative compatibility choice for the Pascal-generation GPU and the older training stack. Stability mattered more than shaving time from a one-off experiment.
Why no validation split?
With only 20 utterances, holding back several clips would make the already tiny training set smaller. I therefore used a zero validation split and no test examples for this pipeline test. That means the run did not provide an honest measure of generalisation; listening tests on phrases outside the training text were essential.
Watching the training run
PyTorch Lightning stored the run beneath lightning_logs. The successful experiment reached beyond epoch 2,200 and produced four retained checkpoint files. The largest checkpoint was around 807 MB:
lightning_logs/
└── version_1/
    └── checkpoints/
        ├── epoch=....ckpt
        ├── epoch=....ckpt
        ├── epoch=....ckpt
        └── epoch=2249-step=1356050.ckpt
A high epoch number did not prove that the voice was improving. With a tiny dataset, extended training can simply memorise the recordings. I judged progress by exporting milestones and generating the same fixed set of unseen sentences.
- Was the voice still intelligible?
- Did it retain the intended cold delivery?
- Were consonants becoming clearer or harsher?
- Did unseen phrases sound natural?
- Was it drifting towards noise or merely memorising the dataset?
Exporting the checkpoint to ONNX
Training checkpoints are large because they contain the information needed to continue training. The deployable Piper voice is much smaller. I exported the selected checkpoint with:
python3 -m piper_train.export_onnx --checkpoint ./lightning_logs/version_1/checkpoints/epoch=2249-step=1356050.ckpt --output-file ./karr_v01.onnxThe export produced:
karr_v01.onnx       approximately 61 MB
karr_v01.onnx.json  approximately 7 KB
The JSON configuration belongs beside the model and uses the same base filename. It describes audio and phoneme settings that the inference engine needs. An ONNX file on its own is not always the complete voice package.
Generating the first test WAV
With Piper available for inference, a first local test looks like:
echo "All systems are operating within acceptable parameters." |
  piper     --model ./karr_v01.onnx     --output_file ./karr-test.wav
I deliberately tested sentences that were not exact copies of the dataset. Repeating the training lines can make a weak model sound more convincing than it really is.
The first result proved the goal: the model spoke locally, carried some of the intended character and could be packaged for my local KARR-inspired system. It was a technical voice experiment focused on the local TTS pipeline rather than reproducing a television performance. Some phrases were far stronger than others, which is exactly what I expected from 20 utterances.
What I would improve in version 2
- Record a much larger and more phonetically varied dataset.
- Include numbers, abbreviations, questions and longer sentences.
- Keep delivery consistent instead of exaggerating every line.
- Remove room reflections, clicks and inconsistent background noise.
- Reserve a real validation set once enough recordings exist.
- Export several checkpoints and compare them blind rather than assuming the latest is best.
- Measure real-time performance on the device that will ultimately run the voice.
Connecting the model to KARR
The existing KARR assistant already accepts text, sends it to a local Ollama model and drives the custom interface through WebSockets. The next integration step is straightforward in principle:
User prompt
    ↓
Local KARR language model
    ↓
Text response
    ↓
karr_v01.onnx through Piper
    ↓
Generated WAV audio
    ↓
Playback plus animated voice bars
The useful part of Piper is that the final model can run independently of the heavyweight training environment. RACING-RIG and the 1080 Ti were needed to train and experiment; deployment only needs the exported voice, its configuration and a compatible Piper runtime.
Lessons from the experiment
- GPU visibility is layered. Check WSL, PyTorch and an actual CUDA operation.
- Newest is not always compatible. Piper’s training stack worked after matching older package versions deliberately.
- Prove the pipeline with a small dataset. Twenty clips were enough to expose tooling problems cheaply.
- Do not confuse training loss with voice quality. Export and listen to unseen text.
- Preserve the environment and checkpoints. The model, JSON configuration, commands and dependency list are all part of the result.
Final result
The project turned a small set of custom recordings into a working local KARR voice model. It used the GTX 1080 Ti successfully through WSL, survived a fairly awkward Python compatibility detour, trained beyond epoch 2,200 and exported into a practical 61 MB ONNX package.
More audio will be needed before the voice becomes genuinely convincing across arbitrary speech, but the difficult part is no longer theoretical. The complete path—from dataset to GPU training to a WAV spoken by my own local model—now works.