
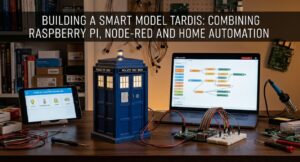

Some of the most rewarding technology projects are the ones where engineering meets something completely unnecessary but genuinely fun.
The Realm Labs TARDIS started as a static display model and gradually evolved into a network-connected automation project with programmable lighting, synchronized audio, scheduled behaviours and integration into Home Assistant.
At the centre of the build is a Raspberry Pi controlling the physical hardware, with Node-RED handling the automation logic and Home Assistant providing the user interface and wider smart-home integration.
The result is a TARDIS that doesn’t just light up.
It reacts.
Looking for the complete project?
Visit the TARDIS Smart Automation Project hub for all of the related hardware, Raspberry Pi and automation guides.
The Idea
The original objective was fairly simple:
make the TARDIS feel alive.
Rather than connecting all of the lighting to a single switch, I wanted independent control over the different parts of the model.
That eventually meant being able to control:
- the top beacon
- the illuminated Police Box sign
- the interior lighting
- audio effects
- timed lighting sequences
- take-off and landing routines
- scheduled behaviour
- Home Assistant controls
Once those individual elements existed, the project could become much more interesting.
Instead of simply turning the model on at a fixed time, it could perform complete sequences depending on the time of day or events elsewhere in the automation system.
Hardware Architecture
The original hardware controller is a Raspberry Pi 4.
Its GPIO header provides direct control over the physical components inside the model.
The TARDIS is divided into several independently controlled elements.
Top beacon
The roof light is connected to its own GPIO output.
Rather than simply switching it on and off, PWM can be used to create a smooth pulse or breathing effect.
This is particularly useful during the take-off sequence.
Interior lighting
The interior lighting has its own output so it can operate independently from the roof beacon.
It can remain illuminated while the top lamp pulses, fade independently or be switched off completely during shutdown.
Police Public Call Box sign
The illuminated sign is another independently controlled channel.
This allows it to remain softly illuminated or use a flickering effect without affecting the other lighting zones.
Audio
Audio is played locally by the Raspberry Pi through an external amplifier and speaker.
This provides the familiar take-off, landing and Cloister Bell effects that are synchronized with the lighting sequences.
The basic physical architecture therefore looks like:
                    Raspberry Pi
                         |
        +----------------+----------------+
        |                |                |
   Top Beacon       Interior LEDs     Police Sign
        |
      GPIO

                         +
                         |
                      Audio
                         |
                   Amplifier
                         |
                      Speaker
Keeping each element independent was one of the most important design decisions in the project.
It meant Node-RED could combine those individual components into much more complex behaviours later.
Splitting Hardware Control from Automation
One of the biggest changes during the project was deciding not to make the Raspberry Pi responsible for everything.
It is very good at controlling GPIO and playing audio.
It doesn’t also need to decide when every event should happen.
The current architecture separates those responsibilities.
Home Assistant
      |
      v
     MQTT
      |
      v
   Node-RED
      |
      v
Raspberry Pi
      |
      +---- GPIO
      |
      +---- Audio
Home Assistant provides the interface.
Node-RED handles the logic.
The Raspberry Pi performs the physical action.
This makes the system considerably easier to maintain and expand.
Raspberry Pi Hardware Controller
The Raspberry Pi runs a collection of small Python scripts that each perform a specific task.
Examples include:
- top lamp breathing
- fast strobe
- interior lighting
- sign lighting
- audio playback
- shutdown sequences
Keeping these as separate functions turned out to be much easier than creating one enormous Python application responsible for every possible state.
For example, the top beacon uses PWM to produce a smooth breathing effect rather than a harsh digital flash.
An early version of the script used physical Pin 35:
#!/usr/bin/env python

import RPi.GPIO as GPIO
import time

LedPin = 35

GPIO.setmode(GPIO.BOARD)
GPIO.setup(LedPin, GPIO.OUT)
GPIO.output(LedPin, GPIO.LOW)

p = GPIO.PWM(LedPin, 1000)
p.start(0)

try:
    while True:

        for dc in range(0, 101, 5):
            p.ChangeDutyCycle(dc)
            time.sleep(0.05)

        time.sleep(0.1)

        for dc in range(100, -1, -5):
            p.ChangeDutyCycle(dc)
            time.sleep(0.05)

        time.sleep(0.1)

except KeyboardInterrupt:

    p.stop()
    GPIO.output(LedPin, GPIO.HIGH)
    GPIO.cleanup()
The effect is simple, but it immediately makes the model feel far more convincing than simply flashing an LED on and off.
The Raspberry Pi side of the project has since grown into its own subject, so the full configuration is documented separately:
Configuring the Raspberry Pi as a TARDIS Hardware Controller
Keeping the Scripts on the NAS
During development I wanted to be able to modify the scripts easily without constantly editing files directly on the Raspberry Pi.
The solution was to keep them on the central Synology NAS and mount the share onto the Pi.
From the Raspberry Pi’s point of view, the scripts still appear as normal files.
From my desktop, however, I can edit the same files directly through the network.
The basic workflow becomes:
Windows PC
    |
    |
Synology NAS
    |
Mounted network share
    |
Raspberry Pi
    |
Node-RED Exec
A mount point can first be created on the Pi:
sudo mkdir -p /mnt/nas/tardis
The filesystem configuration can then be edited:
sudo nano /etc/fstab
For an SMB/CIFS share, an entry might look similar to:
//192.168.x.x/Volume1/Scripts /mnt/nas/tardis cifs credentials=/home/pi/.nascredentials,iocharset=utf8,nofail 0 0
This isn’t essential to the project.
The scripts can just as easily live directly on the Raspberry Pi.
For Realm Labs, though, centralising them on the NAS made development and backup considerably easier.
Node-RED Becomes the Automation Engine
Once the individual hardware functions worked reliably, Node-RED became the real orchestration layer.
Instead of hard-coding schedules and complex sequences into Python, Node-RED decides which actions should happen and when.
The flows combine:
- scheduled events
- Home Assistant triggers
- MQTT messages
- timers
- condition checks
- command execution
That creates a very useful separation:
Node-RED decides WHAT should happen.

The Raspberry Pi decides HOW the physical hardware does it.
This also makes experimentation much easier.
Changing a schedule or altering the order of a sequence usually means editing a Node-RED flow rather than rewriting the GPIO code.
Managing Long-Running Effects
Some TARDIS effects are not one-shot actions.
The sign flicker and interior breathing routines, for example, can run continuously.
Node-RED launches those processes when required and can terminate them when the TARDIS changes state.
A typical sequence might therefore be:
START
  |
  +--> Start interior breathing
  |
  +--> Start sign effect
  |
  +--> Play audio

...

SHUTDOWN
  |
  +--> Stop breathing process
  |
  +--> Stop sign process
  |
  +--> Play shutdown audio
  |
  +--> Turn GPIO outputs off
This became especially useful once scheduled startup and shutdown routines were introduced.
The Hourly Cloister Bell
One of the more entertaining automations is the hourly Cloister Bell routine.
During active hours, Node-RED triggers the event on the hour.
The sequence:
- Starts the Cloister Bell audio.
- Activates the top beacon effect.
- Runs the lighting sequence for a fixed period.
- Returns the model to its normal idle state.
This is exactly the sort of automation that would be unnecessarily awkward to manage inside one large Python script but is very straightforward to visualise in Node-RED.
Sunset Take-Off
The main daily sequence is tied to sunset.
As the house moves into the evening, Home Assistant and Node-RED can trigger the TARDIS take-off routine.
That sequence can combine several independent actions:
Sunset
   |
   +--> Take-off audio
   |
   +--> Top beacon pulse
   |
   +--> Interior lighting
   |
   +--> Police sign illumination
   |
   +--> Idle state
Because the components are independent, the timing between them can be adjusted without changing how the underlying hardware works.
Night-Time Shutdown
The TARDIS doesn’t need to sit flashing away all night.
A scheduled shutdown routine transitions the model into an inactive state.
The shutdown process:
- stops running lighting scripts
- plays the appropriate audio
- disables active effects
- returns the GPIO outputs to their off state
The same concept can be used at sunrise or any other time when the display shouldn’t be active.
This gives the model actual states rather than simply on and off.
Home Assistant Integration
Home Assistant sits above the automation layer and provides the human interface.
From Home Assistant I can expose controls for actions such as:
- power on
- power down
- take off
- lighting effects
- audio
- individual lighting zones
Those controls can appear on the phone, tablet dashboards or other Home Assistant interfaces.
More importantly, the TARDIS becomes part of the wider smart-home environment.
It can react to the same events and schedules as everything else rather than existing as an isolated Raspberry Pi project.
MQTT as the Messaging Layer
MQTT provides a lightweight way for the different parts of the system to communicate.
That has become increasingly important as the TARDIS architecture has expanded.
Rather than tightly coupling every device to every other device, components can publish and subscribe to simple MQTT topics.
Conceptually:
Home Assistant
      |
      v
     MQTT
   /      \
  v        v
Node-RED  ESP32
  |
  v
Raspberry Pi
That architecture also makes adding new hardware much easier.
A new controller doesn’t necessarily need to know anything about Home Assistant or Node-RED internally.
It only needs to understand the MQTT commands relevant to it.
Adding ESP32 Control
As the project grew, some lightweight lighting tasks became suitable for dedicated microcontrollers rather than the Raspberry Pi.
An ESP32 can receive MQTT commands and run its own LED behaviour locally.
That means effects such as:
- ON
- OFF
- BREATHE
- IDLE
- FAST
can be triggered remotely while the actual PWM timing runs on the ESP32.
This further reinforces the distributed architecture:
Home Assistant
        |
      MQTT
        |
    Node-RED
     /    \
    /      \
Pi Hardware  ESP32
Controller   Lighting
Each component does the job it is best suited for.
Expanding Beyond the TARDIS
Once the architecture was proven, there was no reason it had to control only the TARDIS.
The same display eventually expanded to include:
- a LEGO Technic McLaren
- Darth Vader’s TIE Fighter
These models didn’t require audio or the same complexity as the TARDIS.
Instead, they use additional lighting channels and participate in the same scheduled behaviour.
At sunset, the display can come alive together.
At night, everything can shut down as one coordinated installation.
The TARDIS had effectively become the prototype for a wider automated display system.
What Changed During the Build
The project began much more simply than it ended.
Early versions concentrated heavily on running scripts directly on the Raspberry Pi.
As more behaviour was added, responsibilities gradually moved into more appropriate layers:
Raspberry Pi
Physical GPIO and audio control.
ESP32
Lightweight local LED effects.
Node-RED
Sequencing and automation logic.
MQTT
Communication between components.
Home Assistant
User interface and wider smart-home integration.
Synology
Central storage for scripts and project data.
That separation has made the system much easier to change without breaking unrelated parts of it.
What I Learned
Physical automation projects introduce problems that don’t really exist in purely software projects.
Timing matters.
Power matters.
GPIO states matter.
A lighting effect that looks perfect on a bench can look completely different once installed inside a physical model.
Audio and lighting also have to feel synchronized rather than merely being triggered at approximately the same time.
And then there’s cable management.
There is always cable management.
But that is also what makes projects like this interesting.
A homelab doesn’t have to exist purely for running servers, experimenting with networks and deploying enterprise software.
It can also provide the infrastructure needed to make something completely unnecessary come alive.
Explore the Complete TARDIS Project
This article covers the overall build and architecture.
The detailed implementation continues in the dedicated Realm Labs TARDIS project hub:
Explore the TARDIS Smart Automation Project →
Related guides include:
- Configuring the Raspberry Pi as a TARDIS Hardware Controller
- Mastering Home Assistant
- Raspberry Pi Guides
- Home Automation
The TARDIS is still evolving, so new hardware changes, effects and automation experiments will continue to appear across Realm Labs.