
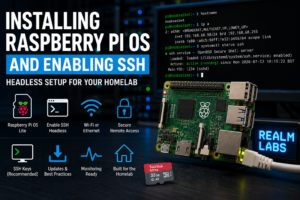

A Raspberry Pi is one of the easiest ways to add a small Linux system to a homelab.
In Realm Labs, Raspberry Pi devices are used for automation, monitoring, MQTT, GPIO projects and other lightweight services. Most of them run headless, so I rarely connect them to a keyboard, mouse and monitor once they are installed.
That makes remote access important from the start.
This guide covers the way I normally prepare a Raspberry Pi for homelab use: install Raspberry Pi OS, configure the network, enable SSH and get the device ready for remote administration.
Why I Run Raspberry Pis Headless
For a lot of homelab projects, a desktop environment is unnecessary.
A Raspberry Pi may spend its entire life:
- running a Python script
- publishing MQTT data
- controlling GPIO
- hosting a lightweight service
- collecting monitoring data
- acting as a utility device
In those cases, the simplest setup is usually:
Raspberry Pi
    |
    +-- Ethernet or Wi-Fi
    |
    +-- SSH
    |
    +-- Managed remotely
Once the Pi is on the network, I can do almost everything from another machine.
What You Need
For this setup you will need:
- a Raspberry Pi
- microSD card or suitable storage
- another computer for imaging
- network access
- Raspberry Pi Imager
A wired Ethernet connection is my preference where practical, especially for devices that are going to become part of the lab infrastructure.
Wi-Fi works perfectly well too, but wired connectivity generally removes one more variable from troubleshooting.
Download Raspberry Pi Imager
Raspberry Pi Imager is the easiest way to prepare the storage.
Install it on your main computer, then connect the SD card or target storage device.
The general process is:
Choose Device
    |
Choose Operating System
    |
Choose Storage
    |
Configure Settings
    |
Write Image
The useful part is the configuration stage, because most of the headless setup can be completed before the Pi even boots.
Choosing Raspberry Pi OS
For most headless homelab devices, I prefer Raspberry Pi OS Lite.
That gives me a minimal operating system without a graphical desktop consuming resources I do not need.
For a normal 64-bit capable Raspberry Pi, I would generally choose a 64-bit Raspberry Pi OS release.
The desktop edition still makes sense if the Pi will actually be used interactively with a monitor.
For unattended infrastructure work, Lite is normally the cleaner option.
Configure the Hostname
Before writing the image, set a hostname.
I strongly prefer naming devices properly from the beginning rather than leaving everything as:
raspberrypiA hostname should describe the system or fit the naming scheme used in your environment.
For example:
noobsaibotor:
tardisThis makes the device much easier to identify later.
Instead of remembering:
192.168.68.47you may be able to connect using:
noobsaibotor the relevant local DNS name.
Set the User Account
Raspberry Pi OS now expects you to define the user account during setup.
Create a normal administrative account and use a strong password.
I avoid leaving default credentials anywhere in the lab.
Even when a device is only accessible internally, predictable default accounts are unnecessary.
Enable SSH Before First Boot
This is the important part for a headless install.
In Raspberry Pi Imager’s customisation options, enable SSH before writing the image.
You can normally choose between:
- password authentication
- public-key authentication
Password authentication is simple for initial setup.
SSH keys are preferable for systems that will remain in regular use.
Once SSH is enabled in the image, the Pi should be remotely accessible from its first boot.
Configure Wi-Fi If Required
If the Pi will use Wi-Fi, enter:
- SSID
- Wi-Fi password
- wireless region
before writing the image.
That means the Pi can boot, connect to the network and become reachable over SSH without ever needing a monitor.
If Ethernet is available, I usually skip Wi-Fi entirely for fixed homelab devices.
Time Zone and Keyboard Settings
It is worth setting the correct:
- time zone
- keyboard layout
- locale
during imaging as well.
These look like small details, but incorrect locale and time settings can make logs and scheduled jobs unnecessarily confusing later.
Write the Image
Once the options are configured, write Raspberry Pi OS to the storage device.
Raspberry Pi Imager will erase the selected disk, so double-check that the correct device is selected before continuing.
After writing and verification are complete, safely remove the card.
Insert it into the Raspberry Pi.
First Boot
Connect:
- storage
- network cable if using Ethernet
- power
Then allow the Pi a short time to complete its first boot.
A headless Raspberry Pi may appear to do nothing visually, but it will be:
Booting Linux
    |
Applying first-boot settings
    |
Configuring network
    |
Starting SSH
Once that process completes, it should appear on the network.
Finding the Raspberry Pi
If local hostname resolution is working, try:
ping noobsaibotor whatever hostname you assigned.
You can also inspect your router or DHCP server to see which address has been assigned.
For example:
Hostname: noobsaibot
IP:       192.168.68.50
Connect with SSH
From Windows PowerShell, Linux or macOS:
ssh [email protected]or, if hostname resolution works:
ssh username@noobsaibotThe first connection normally produces a host-key prompt.
You may see something similar to:
The authenticity of host cannot be established.
Are you sure you want to continue connecting?
After confirming, the key is stored in your local SSH known-hosts file.
Enter the password when prompted.
You should then arrive at the Raspberry Pi shell.
Check the Hostname
Once connected:
hostnameThis should return the name configured earlier.
For example:
noobsaibotYou can also check the full hostname information with:
hostnamectlUpdate Raspberry Pi OS
The first thing I normally do after connecting is update the operating system.
Run:
sudo apt updateThen:
sudo apt full-upgrade -yAfter a larger update, reboot:
sudo rebootThen reconnect over SSH once the Pi comes back online.
Check the IP Configuration
Use:
ip addror:
hostname -Ito confirm the current address.
For DNS and routing:
ip routeand:
cat /etc/resolv.confcan also be useful.
These commands are worth knowing because a surprising number of apparent application problems are actually network problems.
DHCP Reservation vs Static IP
For most fixed devices in Realm Labs, I prefer a DHCP reservation rather than manually configuring a static IP inside the Raspberry Pi.
That keeps address management centralised.
The idea is:
DHCP Server
    |
MAC Address
    |
Reserved IP
The Pi still uses DHCP, but it receives the same address every time.
This avoids scattering static configuration across dozens of devices.
Why Hostnames Matter
Even with a reserved address, I prefer services and scripts to use hostnames where practical.
For example:
mqtt://mosquittois often better than hard-coding:
mqtt://192.168.68.20IP addresses change.
Hostnames can continue pointing to the correct system.
This became particularly obvious as Realm Labs grew and older hard-coded addresses started appearing in scripts and configuration files.
Setting Up SSH Keys
Once the Pi is working, I prefer SSH key authentication for regular access.
On the client machine, generate a key if you do not already have one:
ssh-keygenThen copy it to the Raspberry Pi:
ssh-copy-id username@noobsaibotOn Windows, the exact process may vary depending on the SSH client, but the principle is the same.
Afterwards, test:
ssh username@noobsaibotIf the key is accepted, you should no longer need to type the account password for each connection.
Why SSH Keys Are Better
Keys provide several advantages:
- no password typed during every login
- stronger authentication
- easier scripting
- easier automation
- individual keys can be revoked
This becomes especially useful when one Pi needs to communicate with another system automatically.
Disabling Password SSH
Once key authentication is fully tested, password login can be disabled if desired.
Edit:
sudo nano /etc/ssh/sshd_configFind or add:
PasswordAuthentication noThen restart SSH:
sudo systemctl restart sshDo not disable password login until you have confirmed that key authentication actually works.
Locking yourself out of a headless Pi is an avoidable problem.
Check SSH Status
You can verify that SSH is running with:
sudo systemctl status sshYou should see:
active (running)To enable it at boot:
sudo systemctl enable sshOn a system prepared using Raspberry Pi Imager, this is normally already configured.
Basic Security
For a Pi that will run unattended, I normally check a few basics:
- use a non-default user
- use a strong password
- prefer SSH keys
- keep the OS updated
- do not expose SSH directly to the internet
- remove services that are not required
For internal administration, SSH should normally remain inside the local network or be reached through a VPN or other controlled remote-access solution.
Do Not Expose Port 22 Directly
A common beginner approach to remote SSH is:
Internet
    |
Port 22
    |
Router
    |
Raspberry Pi
I do not recommend that for a normal homelab.
A better pattern is:
Remote Device
    |
VPN
    |
Home Network
    |
Raspberry Pi
or another controlled access layer.
The Raspberry Pi does not need to be directly exposed just because SSH exists.
Installing Useful Tools
Once the Pi is updated, I usually install a small set of tools depending on the project.
For example:
sudo apt install -y \
  curl \
  git \
  htop \
  nano \
  unzip
Not every Pi needs the same software.
I prefer starting minimal and adding only what the project actually requires.
Check System Resources
For a quick view of CPU and memory:
htopDisk space:
df -hMemory:
free -hTemperature:
vcgencmd measure_tempor:
cat /sys/class/thermal/thermal_zone0/tempThese commands are useful when a Pi starts behaving unexpectedly.
Creating a Scripts Folder
A lot of Realm Labs Raspberry Pi projects involve custom Python or shell scripts.
I like keeping them organised.
For example:
mkdir -p ~/scriptsThen:
/home/username/scripts/can hold custom automation and monitoring scripts.
Larger projects can have their own subfolders.
Backups
Once a Raspberry Pi moves from “experiment” to “useful infrastructure”, I start thinking about backups.
The operating system itself is easy to recreate.
The valuable parts are usually:
- scripts
- configuration
- service files
- application data
- project assets
Those should exist somewhere other than only on the Pi.
In Realm Labs, Raspberry Pi backups can be written to central Synology storage.
That means an SD card failure does not necessarily mean rebuilding the whole project from memory.
Raspberry Pi and MQTT
Many Realm Labs Raspberry Pi systems communicate through MQTT.
Once the basic OS and SSH setup are complete, a Pi can publish:
- system health
- sensor values
- automation states
- GPIO events
and receive commands from other systems.
The basic architecture is:
Raspberry Pi
    |
    v
MQTT Broker
    |
    +-- Home Assistant
    +-- Node-RED
    +-- Other Devices
This is one reason I treat the initial OS setup as the foundation rather than the project itself.
Raspberry Pi Monitoring
A Pi that runs unattended should ideally tell you when something is wrong.
Useful values include:
- CPU temperature
- CPU usage
- memory usage
- disk usage
- uptime
- online state
Realm Labs publishes this information over MQTT for some devices so it can be displayed in Home Assistant alongside the rest of the infrastructure.
Headless by Design
Once the Pi has:
Network
SSH
Updates
Backups
Monitoring
I generally have very little reason to attach a monitor again.
That is exactly how I want it.
The Raspberry Pi becomes another manageable Linux node rather than a tiny desktop PC.
Troubleshooting SSH
If SSH does not work, I check the problem in layers.
Can the Pi Be Reached?
ping 192.168.68.50If the device cannot be reached at all, SSH is probably not the first problem to solve.
Is Port 22 Listening?
From another Linux system:
nc -zv 192.168.68.50 22or use another port-checking tool.
If port 22 is closed, check the SSH service on the Pi.
Is SSH Running?
Locally:
sudo systemctl status sshIf required:
sudo systemctl restart sshCheck the Username
A connection such as:
ssh pi@hostwill fail if the user account is actually:
paulThis is especially relevant on newer Raspberry Pi OS installs where the old default pi account is no longer assumed.
Host Key Changed
If the Pi has been rebuilt but reused the same IP or hostname, SSH may warn that the host key has changed.
For example:
WARNING: REMOTE HOST IDENTIFICATION HAS CHANGED!If you know the system has genuinely been rebuilt, remove the old key:
ssh-keygen -R noobsaibotor:
ssh-keygen -R 192.168.68.50Then reconnect.
Do not blindly ignore host-key warnings if you are not expecting the machine to have changed.
What I Have Learned
The main thing I have learned from running multiple Raspberry Pis is that good setup at the beginning saves a lot of work later.
A few habits make a big difference:
- give every device a proper hostname
- reserve its IP centrally
- enable SSH before first boot
- use SSH keys
- keep the installation minimal
- document what the Pi actually does
- back up scripts and configuration
- monitor unattended devices
None of these are complicated.
Together, they make the device much easier to live with.
The Result
A freshly installed Raspberry Pi does not need much before it becomes useful homelab infrastructure.
Raspberry Pi OS provides the base system.
SSH provides remote administration.
DNS and DHCP make it easy to find.
Backups protect the work that matters.
Monitoring tells me when the device is unhealthy.
Once those foundations are in place, the Pi can disappear into the background and get on with the actual job it was built for.
That is how most Raspberry Pi systems end up operating in Realm Labs.