
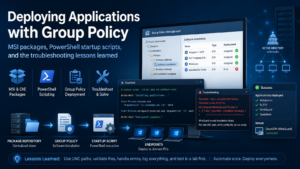

Windows Group Policy makes it possible to centrally deploy applications to domain-joined PCs, but the traditional Software Installation policy has an important limitation: it is primarily designed around Windows Installer packages (.msi).
During this project I wanted domain computers to automatically receive a standard set of applications, including:
- Notepad++
- PuTTY
- WireGuard
- Speedtest by Ookla
- TreeSize Free
- Google Chrome
The first few packages deployed perfectly using normal Group Policy Software Installation. Speedtest, however, highlighted some of the limitations of the traditional approach and eventually led to a much more flexible solution: PowerShell computer startup scripts.
This article covers the complete process, including what worked, what failed, how the errors were diagnosed, and the deployment method I eventually settled on.
The Original GPO Software Deployment
I created an Apps Group Policy Object and linked it to the OU containing my domain computers.
The normal path for deploying MSI packages is:
Computer Configuration → Policies → Software Settings → Software Installation
Packages can then be added using:
New → Package
The important point is that the installer must be referenced using a UNC network path, for example:
\\Seido\The Nexus\Software\putty-64bit.msi
rather than a mapped drive such as:
X:\Software\putty-64bit.msi
A mapped drive normally belongs to a logged-in user’s session. Computer Group Policy runs as the machine account/SYSTEM and cannot assume that the user’s mapped drives exist.
The Apps GPO initially contained several assigned applications.

After running:
gpupdate /force
and rebooting the client, most of the applications installed correctly.
Confirming the GPO Was Actually Applying
When one package fails to install, the first thing to establish is whether the entire GPO is failing or only that application.
On the client I ran:
gpresult /r /scope computer
The result included:
Applied Group Policy Objects
-----------------------------
    Computer Configs
    Apps
    Default Domain Policy
    Local Group Policy
The machine also showed membership of:
EDENIA$
Domain Computers
Authenticated Users
This confirmed that the Apps GPO was definitely being applied to the computer.
That was an important distinction.
If the Apps GPO had not appeared in gpresult, the investigation would have needed to focus on OU placement, security filtering, permissions, WMI filtering or replication.
Instead, the problem was isolated to a particular application.
The Speedtest Problem
The troublesome package was:
speedtestbyookla_x64.msi
Notepad++, PuTTY and WireGuard had installed, but Speedtest by Ookla did not.
Because it was an MSI, it should theoretically have been ideal for Software Installation.
I removed the Speedtest package from the GPO, added it again, ran:
gpupdate /force
and rebooted.
It still didn’t install.
Checking Windows Installer Events
The next step was to determine whether Windows Installer had actually attempted to launch Speedtest.
From PowerShell:
Get-WinEvent -FilterHashtable @{
    LogName='Application'
    ProviderName='MsiInstaller'
    StartTime=(Get-Date).AddHours(-2)
} |
Select-Object TimeCreated, Id, LevelDisplayName, Message |
Format-List
There were Windows Installer events, but they related to Microsoft GameInput.
There was nothing for Speedtest.
That was useful information because it suggested the Speedtest installer wasn’t simply starting and then failing.
Windows Installer apparently wasn’t being invoked for that package at all during Group Policy processing.
Testing the Speedtest MSI Manually
Before blaming the MSI itself, I tested exactly the same installer manually.
From an elevated PowerShell prompt:
msiexec /i "\\Seido\The Nexus\Software\speedtestbyookla_x64.msi" /qn /l*v C:\speedtest.log
The /qn option means:
/qn = completely silent installation
The command returned straight to the PowerShell prompt, which is normal for a successful completely silent installation.
I then checked for the package:
Get-Package -Name "*Speedtest*" -ErrorAction SilentlyContinue
The result was:
Name                 Version       ProviderName
----                 -------       ------------
Speedtest by Ookla   1.15.200.1    msi
So we had now proved several things:
The MSI was valid        ✓
The network path worked  ✓
Silent installation worked ✓
The Apps GPO applied     ✓
Yet Software Installation still refused to deploy it.
At that point, continuing to fight the traditional Software Installation extension wasn’t achieving much.
The Better Alternative: Computer Startup Scripts
Group Policy can execute PowerShell scripts when a computer starts.
This immediately removes the MSI-only limitation.
A startup script can deploy:
MSI
EXE
setup.exe + XML
custom installers
configuration files
services
provided the installer itself supports unattended installation.
The path is:
Computer Configuration → Policies → Windows Settings → Scripts (Startup/Shutdown) → Startup
There is a dedicated PowerShell Scripts tab.
This turned out to be much more flexible.
Deploying Speedtest with PowerShell
I created:
Install-Speedtest.ps1
with the following contents:
$Installer   = "\\Seido\The Nexus\Software\speedtestbyookla_x64.msi"
$ProductName = "Speedtest by Ookla"
$LogFile     = "C:\Windows\Temp\Speedtest-Install.log"

# Check whether Speedtest is already installed
$Installed = Get-Package -Name $ProductName -ErrorAction SilentlyContinue

if ($Installed) {
    exit 0
}

# Make sure installer is reachable
if (-not (Test-Path -LiteralPath $Installer)) {
    exit 1
}

# Install silently
$Process = Start-Process `
    -FilePath "msiexec.exe" `
    -ArgumentList "/i `"$Installer`" /qn /norestart /l*v `"$LogFile`"" `
    -Wait `
    -PassThru

# 0 = success
# 3010 = success, reboot required
if ($Process.ExitCode -eq 0 -or $Process.ExitCode -eq 3010) {
    exit 0
}

exit $Process.ExitCode
The logic is deliberately simple:
Computer starts
       │
       ▼
Is Speedtest already installed?
       │
   ┌───┴────┐
   │        │
  Yes       No
   │        │
 Exit     Can MSI be reached?
            │
         ┌──┴──┐
         │     │
        Yes    No
         │     │
      Install Exit
         │
         ▼
     msiexec /qn
This also prevents Speedtest being unnecessarily installed at every boot.
A Major Gotcha: Don’t Use Mapped Drives
My first startup-script entry exposed another important issue.
The script had been referenced using a path on the mapped X: drive.

This is unreliable for a Computer Startup Script.
At startup:
No user is logged in yet
        ↓
User drive mappings don't exist
        ↓
X: may not exist
        ↓
Startup script cannot be found
The solution was to use the Show Files… button in the Group Policy script configuration window.
This opens the GPO’s own startup-script location within SYSVOL.
I copied:
Install-Speedtest.ps1
into that folder and then added the script from there.
The GPO entry therefore only needs to show:
Install-Speedtest.ps1
The PowerShell file itself can still access software using UNC paths such as:
\\Seido\The Nexus\Software\speedtestbyookla_x64.msi
Once this was corrected, Speedtest installed successfully at startup.
Why SYSVOL Is the Right Place for the Script
The startup script effectively lives inside the GPO structure under SYSVOL, similar to:
\\order.realm\SYSVOL\order.realm\Policies\
    {GPO-GUID}\
        Machine\
            Scripts\
                Startup\
                    Install-Speedtest.ps1
The installer itself does not need to be stored there.
A much cleaner layout is:
SYSVOL
│
└── Install-Speedtest.ps1
         │
         └── Uses UNC path
                  │
                  ▼
\\Seido\The Nexus\Software\
        speedtestbyookla_x64.msi
This keeps small scripts with the GPO while allowing large installation files to remain on a dedicated software share.
Deploying TreeSize Free
Once Speedtest worked, the same mechanism could be used for applications distributed as EXE installers.
For TreeSize Free the installer was:
TreeSizeFreeSetup.exe
stored under:
\\Seido\The Nexus\Software\TreeSize\TreeSizeFreeSetup.exe
An example startup script is:
$Installer = "\\Seido\The Nexus\Software\TreeSize\TreeSizeFreeSetup.exe"

$PossiblePaths = @(
    "C:\Program Files\JAM Software\TreeSize Free\TreeSizeFree.exe",
    "C:\Program Files (x86)\JAM Software\TreeSize Free\TreeSizeFree.exe",
    "C:\Program Files\JAM Software\TreeSize\TreeSizeFree.exe"
)

$Installed = $false

foreach ($Path in $PossiblePaths) {

    if (Test-Path -LiteralPath $Path) {
        $Installed = $true
        break
    }
}

if ($Installed) {
    exit 0
}

if (-not (Test-Path -LiteralPath $Installer)) {
    exit 1
}

$Process = Start-Process `
    -FilePath $Installer `
    -ArgumentList "/VERYSILENT /NORESTART" `
    -Wait `
    -PassThru

if ($Process.ExitCode -eq 0 -or $Process.ExitCode -eq 3010) {
    exit 0
}

exit $Process.ExitCode
Unlike MSI packages, EXE installers do not have a universal silent-install command.
Different installers may use switches such as:
/S
/silent
/quiet
/VERYSILENT
Therefore the correct command-line switches need to be determined for each application.
Deploying Google Chrome
Google provides a 64-bit Enterprise MSI:
googlechromestandaloneenterprise64.msi
stored in my case as:
\\Seido\The Nexus\Software\Chrome\
    googlechromestandaloneenterprise64.msi
Chrome can therefore be deployed using msiexec in exactly the same way.
$Installer   = "\\Seido\The Nexus\Software\Chrome\googlechromestandaloneenterprise64.msi"
$ProductName = "Google Chrome"
$LogFile     = "C:\Windows\Temp\Chrome-Install.log"

$Installed = Get-Package `
    -Name $ProductName `
    -ErrorAction SilentlyContinue

if ($Installed) {
    exit 0
}

if (-not (Test-Path -LiteralPath $Installer)) {
    exit 1
}

$Process = Start-Process `
    -FilePath "msiexec.exe" `
    -ArgumentList "/i `"$Installer`" /qn /norestart /l*v `"$LogFile`"" `
    -Wait `
    -PassThru

if ($Process.ExitCode -eq 0 -or $Process.ExitCode -eq 3010) {
    exit 0
}

exit $Process.ExitCode
Adding verbose MSI logging is particularly useful during testing:
C:\Windows\Temp\Chrome-Install.log
If installation fails, the log remains on the client for investigation.
Package Detection Matters
One difference that became apparent while testing was how each script determines whether an application already exists.
For an MSI application such as Speedtest, this works nicely:
Get-Package -Name "Speedtest by Ookla"
For Chrome:
Get-Package -Name "Google Chrome"
For EXE-based applications, checking for the installed executable may be easier:
Test-Path "C:\Program Files\Vendor\Application\Application.exe"
However, hard-coded installation paths can create problems because applications may install into:
C:\Program Files
or:
C:\Program Files (x86)
and vendors occasionally change directory names between versions.
For MSI applications, package detection is therefore often preferable.
Why I Didn’t Put Everything into One Massive Script
It would be possible to create:
Install-All-Apps.ps1
containing Speedtest, Chrome, TreeSize, Office and every other application.
However, individual scripts have some advantages.
For example:
Install-Speedtest.ps1
Install-Chrome.ps1
Install-TreeSize.ps1
Install-Office.ps1
This makes troubleshooting considerably easier.
If Chrome fails, I know exactly which deployment component is responsible.
It also means individual applications can be enabled, disabled or modified without affecting unrelated software.
Be Careful with Startup Scripts That Change Networking
Earlier in the project I also used Group Policy to configure WireGuard.
That exposed another important lesson.
The initial VPN script was doing more than merely installing software. It was changing:
DNS
network adapters
routing
WireGuard services
During Group Policy processing this caused the machine to temporarily lose access to:
\\order.realm\SYSVOL
resulting in errors similar to:
The processing of Group Policy failed.

Windows attempted to read the file:

\\order.realm\sysvol\order.realm\Policies\
{31B2F340-016D-11D2-945F-00C04FB984F9}\gpt.ini

and was not successful.
This made it initially look as though Group Policy itself was broken.
In reality, the startup process was modifying the network environment that Group Policy itself depended upon.
This is why I now separate simple application deployment from anything that manipulates networking.
WireGuard: Service Deployment vs Application Import
WireGuard also demonstrated another useful distinction.
Installing a configuration using:
wireguard.exe /installtunnelservice DecoVPN.conf
creates a Windows WireGuard tunnel service.
The resulting adapter appeared in Windows Network Connections as:
DecoVPN
WireGuard Tunnel

Initially I expected the configuration to visibly import into the WireGuard desktop application.
Instead, the tunnel had been installed as a Windows service.
Testing showed that it was actually functioning:
sc query "WireGuardTunnel$DecoVPN"
returned:
STATE : 4 RUNNING
and:
"C:\Program Files\WireGuard\wg.exe" show
showed:
interface: DecoVPN

peer: ...
endpoint: 82.x.x.x:51820
allowed ips: 192.168.68.0/24
latest handshake: 39 seconds ago
transfer: 8.05 MiB received, 4.65 MiB sent
persistent keepalive: every 25 seconds
So the tunnel itself was working perfectly.
The remaining problem was DNS.
Diagnosing the VPN DNS Problem
The internal server could be reached by IP:
ping 192.168.68.20
returned:
Reply from 192.168.68.20
However:
ping seido.order.realm
failed.
Running:
nslookup seido.order.realm
showed why:
Server:  cache1.service.virginmedia.net
Address: 194.168.4.100

*** can't find seido.order.realm:
Non-existent domain
The machine was sending the lookup to Virgin Media’s public DNS rather than the internal domain DNS server.
The WireGuard adapter therefore needed:
192.168.68.20
as its DNS server.
This could be enforced with PowerShell:
Set-DnsClientServerAddress `
    -InterfaceAlias "DecoVPN" `
    -ServerAddresses "192.168.68.20"
The script was then made deliberately cautious.
Other physical interfaces would only be reset to automatic DNS after internal domain connectivity had been confirmed.
For example:
if (
    Test-Connection `
        -ComputerName "seido.order.realm" `
        -Count 1 `
        -Quiet
) {

    Set-DnsClientServerAddress `
        -InterfaceIndex $NetAdapter.ifIndex `
        -ResetServerAddresses
}
This prevents a failed VPN configuration from unnecessarily changing working network settings.
Another WireGuard Problem: Installing Directly from a UNC Path
During testing another error appeared:
Not a valid Win32 FileTime
The original script was interacting directly with:
\\Seido\The Nexus\Wireguard\DecoVPN.conf
and then removing the currently working tunnel before confirming that the replacement configuration could actually be used.
That was risky.
The improved sequence became:
Copy configuration from server
            ↓
Verify local file exists
            ↓
Only then remove existing tunnel
            ↓
Install new tunnel
The local configuration was stored as:
C:\ProgramData\WireGuard\DecoVPN.conf
This means a temporary failure to access the network share cannot destroy an already-working VPN configuration.
That same principle applies to application deployment:
Validate dependencies before removing or changing something that already works.
Logging Makes Startup Scripts Much Easier to Troubleshoot
Startup scripts run without a normal interactive user interface.
If something fails, it may appear that nothing happened at all.
For MSI packages I therefore prefer verbose logs.
Example:
$LogFile = "C:\Windows\Temp\Application-Install.log"

Start-Process `
    -FilePath "msiexec.exe" `
    -ArgumentList "/i `"$Installer`" /qn /norestart /l*v `"$LogFile`"" `
    -Wait
If the installation fails, search the log for:
Return value 3
which normally occurs close to the actual Windows Installer failure.
Useful Troubleshooting Commands
Several commands proved particularly useful during this project.
Confirm computer GPOs
gpresult /r /scope computer
For significantly more detail:
gpresult /z > C:\gp.txt
notepad C:\gp.txt
Force Group Policy refresh
gpupdate /force
Software assigned to computers will commonly require a reboot before installation occurs.
Check installed MSI packages
Get-Package
or:
Get-Package -Name "*Speedtest*"
Query recent Windows Installer events
Get-WinEvent -FilterHashtable @{
    LogName='Application'
    ProviderName='MsiInstaller'
    StartTime=(Get-Date).AddHours(-2)
} |
Select-Object TimeCreated, Id, LevelDisplayName, Message |
Format-List
Test an MSI silently
msiexec /i "\\server\share\application.msi" /qn
With logging:
msiexec /i "\\server\share\application.msi" /qn /l*v C:\install.log
Find useful errors in the MSI log
Select-String `
    -Path C:\install.log `
    -Pattern "Return value 3" `
    -Context 10,10
A Better Software Deployment Layout
The resulting setup is now essentially:
Active Directory
│
└── Apps GPO
     │
     ├── Traditional Software Installation
     │      ├── Notepad++
     │      ├── PuTTY
     │      └── WireGuard
     │
     └── Computer Startup PowerShell Scripts
            ├── Install-Speedtest.ps1
            ├── Install-TreeSize.ps1
            ├── Install-Chrome.ps1
            └── future applications...
The installers themselves remain centrally stored under:
\\Seido\The Nexus\Software\
For example:
Software
│
├── Chrome
│   └── googlechromestandaloneenterprise64.msi
│
├── TreeSize
│   └── TreeSizeFreeSetup.exe
│
├── speedtestbyookla_x64.msi
│
└── Office
    └── ...
MSI Software Installation vs Startup Scripts
Traditional Software Installation is still useful.
For a simple, well-behaved enterprise MSI:
GPO Software Installation
is extremely easy to manage.
But startup scripts provide considerably more flexibility.
| Requirement | Software Installation | PowerShell Startup |
|---|---|---|
| MSI deployment | ✓ | ✓ |
| EXE deployment | ✗ | ✓ |
| Custom silent switches | Limited | ✓ |
| Installation detection | Limited | ✓ |
| Conditional logic | ✗ | ✓ |
| Custom logging | Limited | ✓ |
| Network tests | ✗ | ✓ |
| Multiple deployment methods | ✗ | ✓ |
| Custom error handling | ✗ | ✓ |
The trade-off is that PowerShell deployment requires more work to design correctly.
Lessons Learned
The biggest lesson from this project is that a package being an MSI does not automatically guarantee that Group Policy Software Installation will behave exactly as expected.
Speedtest was the perfect example.
The installer:
speedtestbyookla_x64.msi
worked perfectly when run as:
msiexec /i speedtestbyookla_x64.msi /qn
yet repeatedly failed to deploy using the Software Installation policy.
Rather than spending more time forcing that particular deployment mechanism to work, moving it to a Computer Startup PowerShell script gave much more control.
The other major lessons were:
- Use UNC paths, not mapped drives, for computer-level deployments.
- Store startup
.ps1files inside the GPO using Show Files…. - Keep installers on a dedicated central software share.
- Detect whether applications already exist before installing.
- Use
/qnfor unattended MSI installation. - Add verbose installer logs during testing.
- Treat exit code
3010as success with a reboot required. - Don’t casually manipulate DNS or networking during Group Policy processing.
- Verify remote resources before removing a working configuration.
- Separate complicated deployments into individual scripts so one failure doesn’t affect everything else.
Conclusion
What started as a straightforward attempt to push a few MSI applications through Active Directory ended up producing a much more useful deployment framework.
Group Policy’s built-in Software Installation feature remains great for straightforward MSI packages, but PowerShell computer startup scripts remove most of its limitations.
They allow the same domain infrastructure to deploy:
MSI installers
EXE installers
silent setup programs
Office deployments
configuration files
services
VPN components
while still retaining central control through Group Policy.
For this environment, the combination of:
Active Directory
       +
Group Policy
       +
SYSVOL PowerShell scripts
       +
\\Seido\The Nexus\Software
has turned into a simple but surprisingly capable software deployment system.
And importantly, the Speedtest failure wasn’t wasted troubleshooting—it exposed exactly where traditional GPO Software Installation stops being convenient and where PowerShell becomes the better tool.