
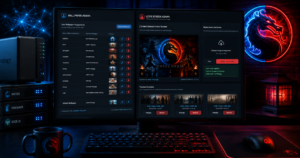

Managing wallpapers and lock screens through Group Policy is straightforward when every machine receives the same image. It becomes more interesting when you want individual users to have different wallpapers, want to change images without editing scripts, and want a simple way to roll back previous versions.
For my order.realm home lab domain, I ended up building two small web applications:
- a Wallpaper Admin site for assigning different wallpapers to domain users
- a Lock Screen Admin site for managing the global domain lock screen
Both are hosted on my Synology NAS and work alongside the existing Group Policy deployment scripts.
The objective was to make routine changes possible from a browser without needing to edit PowerShell scripts or manually rename files every time.
The Existing Environment
The environment is based around a Synology NAS acting as the domain controller and file server.
The main shared storage used by the deployment scripts is available to Windows clients as:
\\Seido\The Nexus\SharedOn the Synology itself, the same location is:
/volume1/The Nexus/SharedThis distinction becomes important later when Docker containers are introduced.
Windows accesses the location over SMB using the UNC path, while a Docker container running locally on the Synology mounts the Linux filesystem path directly.
Part 1 – The Wallpaper System
The wallpaper system was already working before the web interface was added.
The basic client-side process was:
\\Seido\The Nexus\Shared
        ↓
Copy-Wallpapers.ps1
        ↓
C:\ProgramData\OrderRealm\Wallpapers
        ↓
Set-Wallpaper.ps1
        ↓
Current user's Windows wallpaper
The client machines therefore do not continuously use the NAS image directly.
Instead, wallpaper files and the configuration are copied locally to:
C:\ProgramData\OrderRealm\WallpapersThis has a few advantages.
The wallpaper remains available if the NAS is briefly unavailable, login is not dependent on retrieving a large image across the network, and the actual wallpaper script operates on a predictable local path.
Using a Wallpaper Mapping File
Rather than hard-coding every user and wallpaper into PowerShell, the configuration is stored in a JSON file.
For example:
{
  "default": "admin-mk.jpg",
  "users": {
    "SubZero": "Bar-Wallpaper.jpg",
    "lamb": "raiden-1up.png",
    "racingsim": "rbracing.jpg",
    "Scorpion": "scorpion.png",
    "Turokhan": "raiden-thunder.png",
    "Ermac": "Raiden-wp.jpg",
    "administrator": "admin-.png",
    "Amanda": "cow.jpg",
    "Emma": "sausage-dog.jpg",
    "Luke": "feet-sleeping-sleep-bed.jpg"
  }
}
A particularly important lesson here was to key the mappings against the user’s Active Directory sAMAccountName, rather than their display name.
The client script can therefore determine the logged-on username and look it up directly in the JSON.
Conceptually:
$username = $env:USERNAMEThe script reads:
wallpaper-map.jsonfinds that username under users, and applies the associated image.
If no user-specific assignment exists, the default image can be used.
Copying the Wallpaper Files Locally
The deployment script copies both the configuration and supported image formats from the NAS.
The wallpaper updater eventually supported:
*.jpg
*.jpeg
*.png
wallpaper-map.json
This sounds minor, but it prevents a surprisingly common problem where an image exists and looks correct but is silently ignored because its extension is not included in the copy script.
The resulting local directory might contain:
C:\ProgramData\OrderRealm\Wallpapers\

wallpaper-map.json
admin-mk.jpg
Bar-Wallpaper.jpg
raiden-1up.png
rbracing.jpg
raiden-thunder.png
Raiden-wp.jpg
The Group Policy side of the system therefore remains very simple.
GPO handles getting the scripts onto the machine and executing them; the JSON file decides which wallpaper a user receives.
Why Add a Web Interface?
The JSON approach was much better than hard-coding the mappings, but changing a wallpaper still meant editing a file manually.
That was the next problem to solve.
I wanted a browser page where I could:
- see the domain users
- see the wallpaper currently assigned to each user
- preview available images
- upload new wallpaper files
- change a user’s assignment
- save the updated configuration
The key principle was that the website should not replace the working GPO solution.
It should simply become an easier management interface for the files the GPO system already understands.
That separation turned out to be useful.
The Windows deployment mechanism does not care whether wallpaper-map.json was written by hand or generated by a web application.
Hosting the Wallpaper Manager on Synology
The Wallpaper Admin application runs as its own small web service.
The relevant Synology directory is mounted into the container:
/volume1/The Nexus/Sharedand exposed inside the application as something similar to:
/app/wallpapersA Docker Compose configuration can therefore use:
services:
  orderrealm-wallpaper:
    build: .
    container_name: orderrealm-wallpaper
    restart: unless-stopped

    ports:
      - "3020:3020"

    volumes:
      - "/volume1/The Nexus/Shared:/app/wallpapers"

    environment:
      - PORT=3020
The application runs independently of the client machines.
The web interface changes the centrally stored wallpaper configuration; the existing domain scripts then distribute that configuration in the normal way.
This also meant I did not have to redesign a working Group Policy setup just to add a better management interface.
Part 2 – Building the Lock Screen Admin
After the wallpaper manager was working, the global lock screen was an obvious candidate for the same treatment.
It was actually much simpler.
Unlike wallpapers, there is no per-user mapping.
Every machine ultimately needs one file:
\\Seido\The Nexus\Shared\Lock Screens\order.realm.jpgThe existing lock-screen deployment script already expects that exact filename.
Therefore the web application’s job is simply to manage that file safely.
The Main Design Rule
I did not want the web application to change the client-side script.
The live lock-screen filename must always remain:
order.realm.jpgThat means an existing PowerShell or GPO deployment can continue doing exactly what it did previously.
The website only manages which image currently owns that filename.
Adding Revision History
Simply replacing order.realm.jpg would work, but it would remove an important safety net.
Instead, every deployment archives the previous version.
For example, starting with:
order.realm.jpgthe first replacement produces:
order.realm-rev001.jpg
order.realm.jpg
The next change produces:
order.realm-rev001.jpg
order.realm-rev002.jpg
order.realm.jpg
and so on.
The current image is always:
order.realm.jpgwhile the numbered files provide a complete history.
This made it possible to add Preview and Restore buttons to the web interface.
Restoring an Older Lock Screen
Restoring a revision is also deliberately non-destructive.
Suppose the folder contains:
order.realm-rev001.jpg
order.realm-rev002.jpg
order.realm-rev003.jpg
order.realm.jpg
and I decide to restore rev002.
The application first archives the current order.realm.jpg as the next revision.
Only then does it promote the selected image to:
order.realm.jpgThis means even a rollback creates another recoverable revision.
There is no destructive “replace this and hope” operation.
The Lock Screen Web Interface
The web page provides three main areas.
Current Domain Lock Screen
The current order.realm.jpg is displayed as a large preview along with its modification date.
Deploy New Lock Screen
A new JPG or PNG can be selected or dragged onto the page.
The image is previewed before pressing:
Apply Lock ScreenThe backend then:
- determines the next revision number
- archives the current
order.realm.jpg - processes the uploaded image
- publishes it as
order.realm.jpg - refreshes the current preview and revision list
Previous Revisions
Older images are displayed as thumbnails.
Each one provides:
Preview
Restore
This turns what was previously a manual file-management operation into a very simple browser workflow.
Separating the Two Services
I considered combining the wallpaper and lock-screen applications, but ultimately kept them separate.
That made more sense because their responsibilities are quite different.
The Wallpaper Admin deals with:
- multiple users
- Active Directory account names
- multiple images
- a JSON mapping file
- user-to-image assignments
The Lock Screen Admin deals with:
- one active image
- revision history
- uploads
- restore operations
Keeping them separate reduces the chance of breaking one system while changing the other.
In my setup they therefore live on separate ports, for example:
Wallpaper Admin
http://NAS:3020

Lock Screen Admin
http://NAS:3021
Dockerising the Lock Screen Service
I initially tested the application as a normal Node.js service.
That immediately produced the predictable problem on a Windows workstation:
npm : The term 'npm' is not recognized...Rather than installing Node.js on another machine purely for this service, I moved the application into Docker on the Synology.
This is a better fit anyway because the NAS already hosts the files being managed.
The application files were placed under a NAS-accessible location such as:
\\Seido\The Nexus\Shared\lockscreen-adminwhich corresponds locally on Synology to:
/volume1/The Nexus/Shared/lockscreen-adminThe lock-screen images live at:
/volume1/The Nexus/Shared/Lock ScreensPortainer Stack
A simple Portainer stack can use the official Node Alpine image:
services:
  lockscreen-admin:
    image: node:20-alpine
    container_name: lockscreen-admin
    working_dir: /app

    command: sh -c "npm install && npm start"

    restart: unless-stopped

    ports:
      - "3021:3014"

    environment:
      PORT: 3014
      LOCKS_DIR: /locks

    volumes:
      - "/volume1/The Nexus/Shared/lockscreen-admin:/app"
      - "/volume1/The Nexus/Shared/Lock Screens:/locks"
There are two different ports here deliberately.
The Node application listens inside the container on:
3014while Docker publishes it externally on:
3021Therefore the browser connects to:
http://NAS:3021The application itself continues listening on port 3014 inside its container.
Understanding Synology Paths vs Windows Paths
This was probably the most useful deployment detail to document.
From a Windows PC, the directory may be:
\\Seido\The Nexus\Shared\Lock ScreensThat path cannot simply be inserted into a local Synology Docker volume definition.
Docker running on the Synology uses:
/volume1/The Nexus/Shared/Lock Screensand mounts that inside the container as:
/locksSo there are effectively three views of the same directory:
Windows:
\\Seido\The Nexus\Shared\Lock Screens

Synology:
 /volume1/The Nexus/Shared/Lock Screens

Container:
 /locks
Once that relationship is understood, troubleshooting volume mounts becomes considerably easier.
A Couple of Deployment Problems I Hit
There were a few small but useful lessons during deployment.
Missing Dockerfile
An early Portainer configuration used:
build: .Portainer returned:
failed to read dockerfile:
Dockerfile: no such file or directory
The reason was straightforward: the Portainer stack did not have the application directory as its build context.
For this small project, using:
image: node:20-alpineand bind-mounting the application directory was simpler.
Port Already in Use
I initially tried to expose the service on port 3014.
Docker returned:
bind: address already in useSomething else was already listening there.
Rather than disturb an existing service, I published the container as:
ports:
  - "3021:3014"
This also produced a cleaner numbering scheme alongside the wallpaper admin service.
Missing Bind-Mount Directory
Docker also correctly refuses to start when a bind-mounted source directory does not exist.
For example:
Bind mount failed:
'/volume1/docker/lockscreen-admin' does not exist
Rather than create another storage structure, I used an existing area under:
/volume1/The Nexus/SharedThis also makes the application source easy to access from Windows over SMB.
Adding a Favicon
Once everything was working, I added a small Orderrealm dragon favicon.
The image was saved beside the web application as:
favicon.pngand referenced from the HTML:
<head>
    <meta charset="UTF-8">

    <title>Orderrealm Lock Screen Admin</title>

    <link rel="icon" type="image/png" href="/favicon.png">
</head>
It’s a minor detail, but it makes internal management tools feel considerably more finished when several of them are open in browser tabs.
Why I Prefer This Approach
There are much larger enterprise tools capable of managing desktop branding, but that would be unnecessary for this environment.
This design deliberately keeps responsibilities separate:
Web application
      ↓
Manages configuration and images
      ↓
NAS central storage
      ↓
Existing Group Policy scripts
      ↓
Windows clients
The web application does not try to become a Group Policy replacement.
Likewise, the GPO does not need to understand revisions, uploads or web interfaces.
Each component does one job.
Final Architecture
The finished arrangement looks roughly like this:
                    Synology NAS
                         │
          ┌──────────────┴──────────────┐
          │                             │
          │                             │
 Wallpaper Admin                 Lock Screen Admin
     :3020                            :3021
          │                             │
          │                             │
 wallpaper-map.json             order.realm.jpg
 wallpaper images               revision images
          │                             │
          └──────────────┬──────────────┘
                         │
              \\Seido\The Nexus\Shared
                         │
                    Group Policy
                         │
                  PowerShell scripts
                         │
                    Domain PCs
For wallpaper deployment:
Central files
    ↓
Copy-Wallpapers.ps1
    ↓
C:\ProgramData\OrderRealm\Wallpapers
    ↓
Set-Wallpaper.ps1
    ↓
Per-user desktop wallpaper
For lock screens:
order.realm.jpg
    ↓
Existing lock-screen deployment script
    ↓
C:\ProgramData\OrderRealm\LockScreens
    ↓
Windows lock screen
Conclusion
This started as a very small quality-of-life improvement but ended up being a useful example of joining several technologies together:
- Active Directory
- Group Policy
- PowerShell
- SMB storage
- JSON configuration
- Node.js
- HTML/CSS/JavaScript
- Docker
- Synology
- Portainer
The important part is that none of the web tooling replaced the original domain deployment mechanism.
The Windows clients still receive their settings through the same controlled scripts and policies. The web applications simply provide a safer and more convenient management layer above them.
For a home lab, it is admittedly more elaborate than manually replacing an image.
But that is also the point of a lab: taking a simple problem and using it as an opportunity to build something reusable, understand the underlying technologies, and create tooling that feels closer to what would exist in a managed production environment.