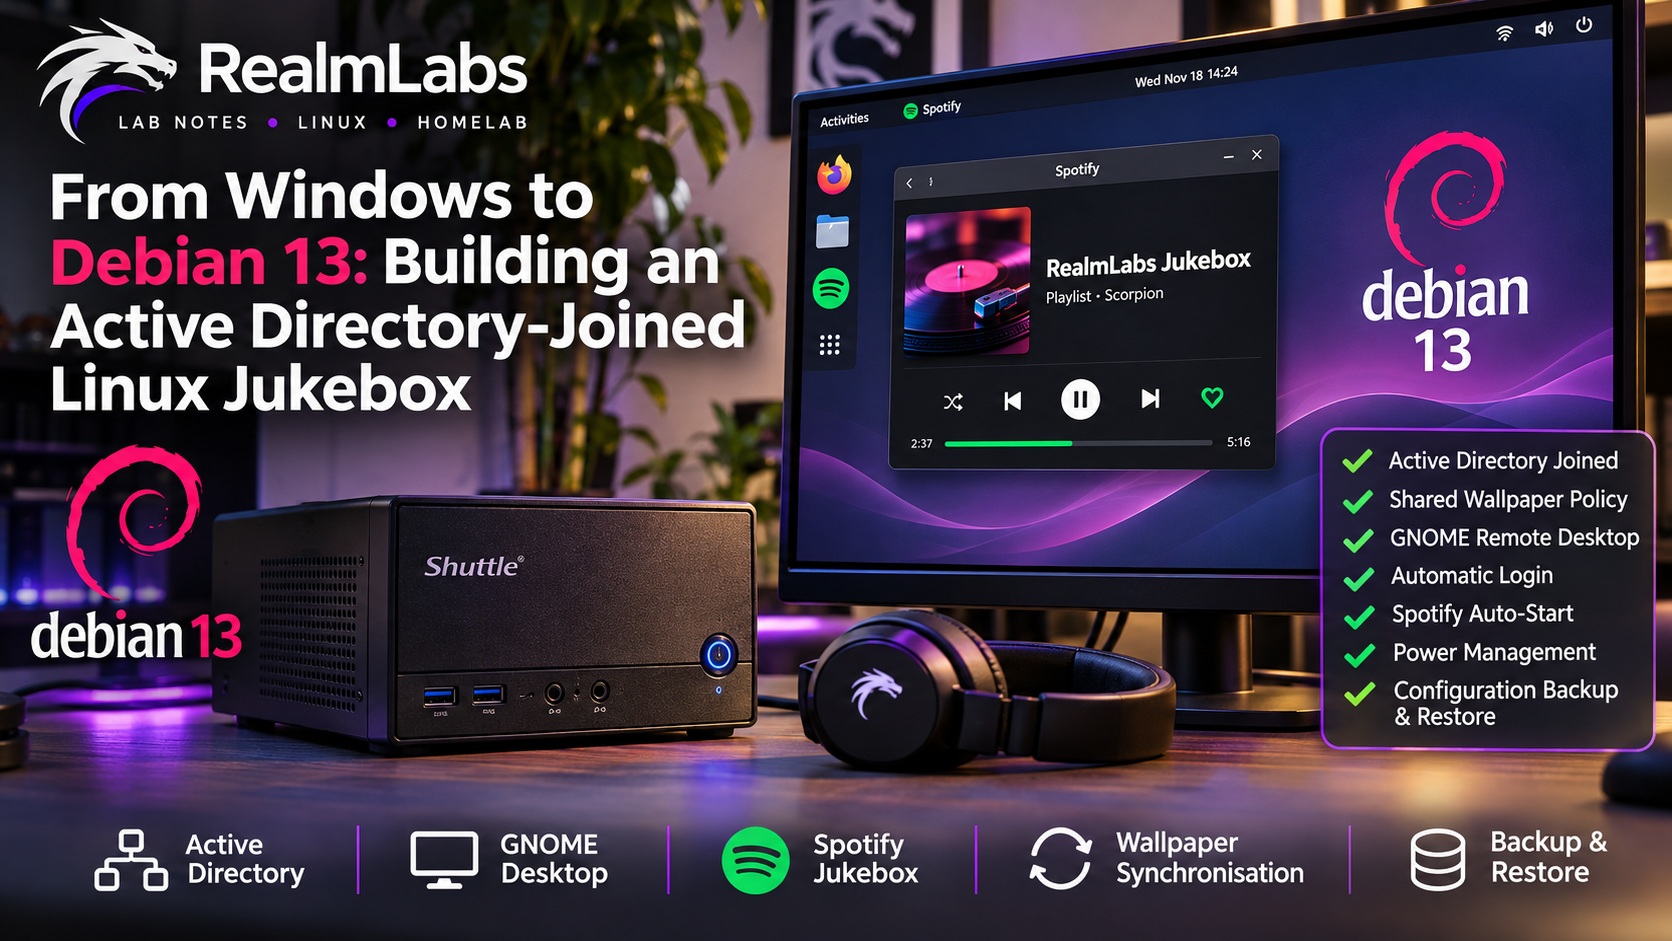

There is something satisfying about giving an old PC a second life. My bar music workstation is a Shuttle DS81D with an Intel Celeron, 4 GB of RAM and a 128 GB Samsung SSD. Rather than trying to persuade another unsupported Windows installation to behave, I wanted to see whether Debian 13 could deliver the same day-to-day conveniences without replacing the hardware.
The challenge was not simply installing Linux. I wanted a machine that could join my existing Active Directory domain, use the same centrally managed wallpaper as Windows, automatically log in, launch Spotify and allow me to control the physical desktop over RDP. And if the SSD failed tomorrow, I wanted a recovery backup that would avoid repeating the whole exercise.
Meet LAMB-DJ-DEB: the Orderrealm jukebox.
The infrastructure behind the experiment
- Shuttle DS81D, Intel Celeron, 4 GB RAM, dual Ethernet and Samsung PM810 SSD.
- Debian 13 (Trixie), GNOME, NetworkManager and systemd.
- NoobSaibot: Raspberry Pi hosting the Netherrealm Deployment System and netboot.xyz.
- Seido: Synology NAS, Active Directory domain controller used for this build, DNS and SMB storage.
- Orderrealm: my existing Active Directory domain, with central wallpaper management.
- Krypt: the NAS backup share.
The Mortal Kombat-inspired names, K spellings and dramatic deployment menu are personal creative choices. None are technical requirements; the same setup works with conventional hostnames and domain names. Adapt the example names and paths below to your own environment.
1. PXE boot: the Celeron refused to cooperate
The installation started through my RealmDeploy satellite infrastructure. DHCP and proxy DHCP responded, and the appropriate bootloaders were requested: netboot.xyz.kpxe in legacy mode and my realmlabs-snp.efi in UEFI mode. The custom menu loaded successfully. Selecting Linux, however, stopped after:
menu-original.ipxe ... ok
boot.cfg ... ok
That was before the Debian installer even started. A packet capture on the PXE server confirmed the initial exchange; it could not see all traffic crossing a switched network.
sudo tcpdump -ni eth0 'host CLIENT_IP or ether host CLIENT_MAC'My first suspects were the upstream HTTPS version check and NTP. I discovered another complication: the container had both /config and /assets mounted. I had changed the configuration copy, not the live HTTP file. Comparing SHA-256 hashes against the HTTP response identified the correct location:
sudo sha256sum /opt/netboot/{config,assets}/menus/menu-original.ipxe
curl -fsS http://PXE_SERVER:8080/menus/menu-original.ipxe | sha256sum
Disabling the external checks in the live file made no difference. Rather than guessing, I inserted diagnostic echo statements around the instructions in boot.cfg. The final message on screen was DEBUG 02 - Before SecureBoot check. The next instruction was the culprit:
iseq ${efi/SecureBoot} 01 && set sigs_enabled false ||Skipping this lookup allowed the menu to continue. The evidence points to a firmware/iPXE compatibility problem when reading the EFI variable on this older Shuttle. It does not establish that every DS81 has the same fault. Since signature checking was already disabled in this local netboot configuration, the lookup was redundant here.
cd /opt/netboot/assets/menus
sudo cp boot.cfg boot.cfg.pre-compatibility
sudo sed -i '/^iseq .*efi\/SecureBoot/s/^/# RealmLabs - Legacy UEFI compatibility fix: /' boot.cfg
curl -fsS http://PXE_SERVER:8080/menus/boot.cfg | grep -E 'SecureBoot|sigs_enabled'
I restored the unrelated version and NTP checks and removed the debug statements. This is not a recommendation to disable Secure Boot or image verification on a secure deployment system. Secure Boot was already disabled on this particular PC. Future netboot.xyz menu updates may overwrite the local compatibility patch.
Both physical NICs were also added to my satellite PXE allowlist. On Linux, ip -br link lists both adapters, including the disconnected one. On Windows, Get-NetAdapter -Physical does the same. I prefer confirming both addresses rather than assuming consecutive MAC addresses.
2. A fresh Debian workstation joins Active Directory
With the PXE fault out of the way, Debian installed normally. Since I had set a root password during installation, my local administrator was not initially a member of sudo. I used su -, added the account with usermod -aG sudo LOCAL_ADMIN and reconnected over SSH to pick up the new group membership.
sudo hostnamectl set-hostname lamb-dj-deb
sudoedit /etc/hosts
# Set the 127.0.1.1 entry to the new FQDN and short hostname.
sudo apt update
sudo apt install -y realmd sssd sssd-ad sssd-tools adcli krb5-user \
  samba-common-bin libnss-sss libpam-sss packagekit dnsutils \
  cifs-utils smbclient dconf-cli
DNS was the next issue. Debian had received ISP DNS servers via DHCP, which obviously knew nothing about my internal AD domain. NetworkManager let me keep DHCP for the IP address but override DNS persistently.
CON=$(nmcli -g GENERAL.CONNECTION device show enp3s0)
sudo nmcli connection modify "$CON" \
  ipv4.ignore-auto-dns yes ipv4.dns "AD_DNS_IP" \
  ipv4.dns-search "order.realm" ipv6.ignore-auto-dns yes
sudo nmcli device reapply enp3s0
dig _ldap._tcp.dc._msdcs.order.realm SRV +short
timedatectl
sudo realm discover order.realm
The built-in Administrator account failed Kerberos preauthentication. My authorised domain administrator account successfully acquired a ticket, so I used that account to join instead.
kinit [email protected]
klist
sudo realm join --verbose --user=DOMAIN_ADMIN order.realm
sudo adcli testjoin
sudo pam-auth-update --enable mkhomedir
Successful enrollment created the computer account and a fresh /etc/krb5.keytab. I enabled short usernames in /etc/sssd/sssd.conf with use_fully_qualified_names = False, while retaining fallback_homedir = /home/%u@%d to separate domain home directories from local ones. After restarting SSSD, the domain user Scorpion and his AD security groups resolved correctly.
sudo sss_cache -E
sudo systemctl restart sssd
id scorpion
getent passwd scorpion
sudo sssctl user-checks scorpion -s gdm-password
There was one further snag: PAM returned a system error during account authorisation. Temporarily setting ad_gpo_access_control = disabled under the SSSD domain section made the check succeed. Scorpion could log in and PAM created his home folder.
Security caveat: this diagnostic workaround removes SSSD’s AD GPO-based login enforcement. It is not an appropriate final access policy for a general-purpose managed workstation. Explicitly restrict permitted AD users/groups or repair GPO processing and test access before using this configuration more widely. I retained a separate local recovery administrator. GPO processing is not the same thing as applying Windows desktop policies on Linux.
3. One wallpaper policy for Windows and Linux
I already have a central wallpaper and lock screen manager. Windows uses PowerShell to read a JSON mapping on Seido. Rather than duplicating that policy, I wrote a Linux equivalent.
{
  "default": "default.jpg",
  "users": {
    "Scorpion": "scorpion.png",
    "lamb": "jukebox.png"
  }
}
The example illustrates the actual mapping structure; the real image names may contain spaces. The Python script matches usernames case-insensitively, downloads the assigned image into a user-owned local cache and uses GNOME’s gsettings to set both light and dark wallpapers. A file hash in the local filename prevents stale wallpaper caching. The script exits without changing the existing wallpaper if synchronisation fails.
Kerberos single sign-on worked with SMB, but the first scripted attempt failed when using --no-pass. Explicitly passing the user’s credential cache solved it:
klist
smbclient "//seido.order.realm/The Nexus" \
  --use-krb5-ccache="$KRB5CCNAME" \
  -c 'cd Shared; get "wallpaper-map.json" mapping.json'
For a desktop application, run the wallpaper-setting commands as the logged-in GNOME user, not root, with that user’s session bus.
gsettings set org.gnome.desktop.background picture-uri "file:///path/to/wallpaper.png"
gsettings set org.gnome.desktop.background picture-uri-dark "file:///path/to/wallpaper.png"
gsettings set org.gnome.desktop.background picture-options zoom
I installed the script at /usr/local/bin/orderrealm-wallpaper and added a system-wide GNOME autostart entry:
[Desktop Entry]
Type=Application
Name=Orderrealm Wallpaper Sync
Exec=/usr/local/bin/orderrealm-wallpaper
OnlyShowIn=GNOME;
Terminal=false
X-GNOME-Autostart-enabled=true
Scorpion logged in and the same assigned wallpaper appeared in GNOME. That was one of my favourite moments of the build: one mapping, two operating systems, no duplicate configuration and no stored share password.
4. Spotify and remote control of the actual desktop
I installed the native Spotify Linux client using Spotify’s Debian repository instructions. Use the currently published signing key rather than copying an old key from a guide. The client was installed system-wide and launched from Scorpion’s session.
For remote access I deliberately chose GNOME Remote Desktop instead of a separate XRDP session. I want to control the existing bar desktop and keep sound on the physical machine, not start another desktop somewhere else.
sudo apt install -y gnome-remote-desktop
sudo ss -lntp | grep 3389
loginctl list-sessions
In GNOME Settings, System → Remote Desktop → Desktop Sharing, I enabled sharing and remote control. Windows initially reported an authentication error. Debian’s journal revealed SEC_E_MESSAGE_ALTERED and an NTLM Message Integrity Check failure. Setting dedicated RDP credentials instead of automatically supplying domain credentials fixed the connection. I left NLA enabled.
sudo journalctl -b _COMM=gnome-remote-de --no-pager -n 60
# Run from the logged-in GNOME user's terminal:
grdctl rdp set-credentials realmrdp 'YOUR_DEDICATED_RDP_PASSWORD'
grdctl rdp disable-view-only
Use a strong, unique RDP password and enter it privately; avoid saving a real password in shell history. On Windows I cleared the stale saved RDP credential and reconnected with the dedicated login. I could then see Scorpion’s actual desktop, including the centrally managed wallpaper.
5. Automatic login creates a Kerberos problem
For a dedicated jukebox I configured GDM automatic login in /etc/gdm3/daemon.conf:
[daemon]
AutomaticLoginEnable=true
AutomaticLogin=scorpion
Spotify was configured to start automatically by copying its desktop entry into Scorpion’s ~/.config/autostart/. I disabled automatic suspend, idle dimming, screen blanking and screen locking for this particular use case. The Dell 17-inch display was already running at its preferred 1280 × 1024 resolution.
gsettings set org.gnome.desktop.session idle-delay 0
gsettings set org.gnome.desktop.screensaver lock-enabled false
gsettings set org.gnome.desktop.screensaver idle-activation-enabled false
gsettings set org.gnome.settings-daemon.plugins.power idle-dim false
gsettings set org.gnome.settings-daemon.plugins.power sleep-inactive-ac-type nothing
These settings intentionally trade physical access security for convenience. Do not use an unattended, unlocked domain session for a privileged or sensitive workstation. Also note that GNOME’s keyring can remain locked after automatic login, so RDP must be tested after a reboot, not just while its port is listening.
The real obstacle: GDM could identify Scorpion through SSSD without authenticating his password. No personal Kerberos ticket was issued. Spotify and the cached wallpaper survived, but new SMB downloads did not. I did not want to store the user’s domain password on disk.
6. Machine-account Kerberos: the proper solution for this jukebox
The computer already possessed an AD machine-account keytab. Why not use it to retrieve the non-sensitive wallpaper instead of borrowing a user’s identity?
sudo klist -k /etc/krb5.keytab
# Run as root, in a temporary private credentials cache:
CACHE_DIR=$(mktemp -d /run/orderrealm-test.XXXXXX)
export KRB5CCNAME="FILE:$CACHE_DIR/ccache"
trap 'kdestroy 2>/dev/null || true; rm -rf "$CACHE_DIR"' EXIT
kinit -k -t /etc/krb5.keytab '[email protected]'
smbclient '//seido.order.realm/The Nexus' \
  --use-krb5-ccache="$KRB5CCNAME" -c 'cd Shared; ls'
It worked. Seido recognised the computer principal and allowed it to read the wallpaper directory. I did not have to change the NAS permissions for this test, although existing machine-account access should be audited and restricted to read-only access to a dedicated wallpaper repository wherever practical.
I created a root-owned Python synchronisation script at /usr/local/sbin/orderrealm-wallpaper-sync. It obtains a temporary machine ticket, downloads the JSON, selects Scorpion’s assigned image, writes it atomically to /var/lib/orderrealm-wallpaper/ and removes the temporary credentials cache. The root-owned cache contains only the selected image and a minimal mapping for Scorpion. The desktop script falls back to this cache if no valid personal Kerberos ticket is present.
[Unit]
Description=Orderrealm Machine Wallpaper Synchronisation
Wants=network-online.target
After=network-online.target
Before=display-manager.service

[Service]
Type=oneshot
ExecStart=/usr/local/sbin/orderrealm-wallpaper-sync
TimeoutStartSec=60
UMask=0077

[Install]
WantedBy=multi-user.target
sudo systemctl daemon-reload
sudo systemctl enable --now orderrealm-wallpaper-sync.service
sudo journalctl -b -u orderrealm-wallpaper-sync --no-pagerOne subtle bug: the restrictive service umask made the new wallpaper directory root-only. Explicitly setting the cache directory to mode 0755 and the image/mapping files to 0644 solved it. The temporary Kerberos cache stays private, and the machine keytab remains root-only. The desktop script also had to handle an absent KRB5CCNAME rather than indexing the environment unconditionally.
After reboot, the machine-account wallpaper download finished in approximately one second, followed by the automatic Scorpion desktop session, Spotify and the RDP listener. The existing local wallpaper provides a fallback when the NAS is unavailable. This is a machine-specific implementation: other users still use personal authentication, and personal SMB shares are not made passwordless by the machine account.
7. Backing up the configuration to Krypt
Rather than image the entire SSD, I created a small recovery archive containing manually installed package names, system inventory, SSSD and Kerberos configuration for reference, GNOME settings, wallpaper scripts, the systemd service, the local wallpaper cache and autostart entries.
apt-mark showmanual > packages-manual.txt
dpkg-query -W > packages-all.txt
# Run as the target desktop user in their session:
dconf dump /org/gnome/desktop/ > gnome-desktop.ini
dconf dump /org/gnome/settings-daemon/plugins/power/ > gnome-power.ini
The actual backup script stages an allowlist of configuration files, creates a timestamped tar.gz archive and validates it with gzip -t and SHA-256. It excludes the machine keytab, cached domain credentials, GNOME keyring and Spotify login tokens. On a clean install I want to rejoin the domain and establish fresh credentials, not resurrect old ones.
Modern SCP uses SFTP by default. Seido rejected the subsystem request, so I used legacy SCP mode:
scp -O "$BACKUP" "NAS_USER@NAS_HOST:/volume1/Krypt/LAMB-DJ-DEB/Backups/"
ssh NAS_USER@NAS_HOST 'sha256sum /volume1/Krypt/LAMB-DJ-DEB/Backups/*.tar.gz'
The resulting archive was only 4.9 MB and transferred successfully. The NAS initially assigned overly broad file permissions, so the next step is to restrict the archive and review inherited DSM ACLs. Compare the remote checksum with the original before relying on the backup.
The recovery plan is fresh Debian via PXE, hostname and DNS configuration, package installation, a fresh domain join, then restoration of the allowlisted scripts, services, wallpaper cache and desktop settings. RDP and Spotify authentication must be recreated, and automatic login should be enabled only after verification. The restore helper and recovery plan are discussed again below following the later additions. A full clean-install recovery has not yet been tested. This is a configuration backup, not a disk image or personal-file backup.
8. The final automatic-login snag: GNOME Keyring 48
After publishing the first version of this build, I discovered that Spotify launched automatically but displayed an authentication dialog: the login keyring had not been unlocked. RDP also stopped accepting connections, despite the listener being present. Both symptoms followed automatic login, which supplies no password to unlock GNOME Keyring.
The usual gnome-keyring-daemon --unlock attempt from SSH reported success-looking output, but the desktop’s Secret Service still reported b true for its Locked property. The reason became clear when I inspected the processes and sockets:
sudo pgrep -a -u scorpion gnome-keyring
sudo ss -xlpn | grep /keyring/

UID_SCORPION=$(id -u scorpion)
sudo -H -u scorpion env \
  XDG_RUNTIME_DIR="/run/user/$UID_SCORPION" \
  DBUS_SESSION_BUS_ADDRESS="unix:path=/run/user/$UID_SCORPION/bus" \
  busctl --user status org.freedesktop.secrets
Two keyring daemons were running. One was the original systemd-managed Secret Service; the second had been started by my SSH unlock attempt and had created a competing control socket. I rebooted to clear the duplicate and confirmed that only the original daemon was running.
Rather than start another daemon, I then used a small Python helper to communicate with the existing Unix control socket. This was tested successfully on this machine with GNOME Keyring 48.0. It uses an internal protocol, not a stable public API; do not assume it works unchanged in future releases. Run it only after confirming a single daemon owns the socket, as the logged-in desktop user via an administrator’s SSH session:
sudo -H -u scorpion python3 - <<'PY'
import getpass
import os
import socket
import struct

uid = os.getuid()
password = getpass.getpass("Keyring password: ").encode()

with socket.socket(socket.AF_UNIX, socket.SOCK_STREAM) as s:
    s.settimeout(10)
    s.connect(f"/run/user/{uid}/keyring/control")
    credentials = struct.pack("3i", os.getpid(), uid, os.getgid())
    s.sendmsg([b"\0"], [
        (socket.SOL_SOCKET, socket.SCM_CREDENTIALS, credentials)
    ])
    s.sendall(struct.pack(">III", 12 + len(password), 1, len(password))
              + password)
    response = s.makefile("rb").read(8)
    size, result = struct.unpack(">II", response)
    print("Unlock result:", result)
PY
sudo -H -u scorpion env \
XDG_RUNTIME_DIR="/run/user/$(id -u scorpion)" \
DBUS_SESSION_BUS_ADDRESS="unix:path=/run/user/$(id -u scorpion)/bus" \
busctl --user get-property org.freedesktop.secrets \
/org/freedesktop/secrets/collection/login \
org.freedesktop.Secret.Collection LockedThis time the unlock returned 0 and the Secret Service reported b false. No keyring files were deleted and no password was written to disk or passed on a command line. RDP could be recovered by restarting the user service with the same session environment:
sudo -H -u scorpion env \
  XDG_RUNTIME_DIR="/run/user/$(id -u scorpion)" \
  DBUS_SESSION_BUS_ADDRESS="unix:path=/run/user/$(id -u scorpion)/bus" \
  systemctl --user restart gnome-remote-desktop.service
For the permanent fix, I installed Seahorse (sudo apt install -y seahorse) from the local administrator’s SSH session. Scorpion is deliberately not a sudoer. From the recovered desktop I opened Passwords and Keys, right-clicked Login, selected Change Password, entered the existing keyring password and left the new password empty. I accepted the warning about unencrypted storage. Following a reboot, Spotify and interactive RDP worked without manually unlocking the keyring.
Important security trade-off: this removes encryption from that local keyring. Anyone who can read its files can potentially access the saved secrets. It is a conscious convenience decision for this dedicated, physically controlled, non-administrative music account, not a recommendation for general-purpose workstations. Password-based desktop login with a protected keyring is preferable for sensitive accounts. No AD password is embedded in the startup scripts. The keyring itself remains excluded from the recovery backup.
9. RealmJukebox: from Spotify PC to music appliance
Once unattended login was reliable, I wanted more than just opening Spotify. The desired startup sequence was open, maximise, select the bar playlist, shuffle and play. The native Spotify client exposed its MPRIS playback controls, and its XWayland window was visible to wmctrl in this GNOME session.
sudo apt install -y playerctl wmctrl
# From the actual desktop session:
playerctl -p spotify play
wmctrl -lx
wmctrl -x -r spotify.Spotify -b add,maximized_vert,maximized_horz
I tested opening my chosen playlist with playerctl -p spotify open. It opened correctly. The example below uses a placeholder playlist ID; replace it with the ID from your own Spotify playlist URL. The startup helper is installed as the desktop user, not root.
mkdir -p ~/.local/bin ~/.config/autostart
cat > ~/.local/bin/realmjukebox.sh <<'EOF'
#!/bin/bash
PLAYLIST="spotify:playlist:YOUR_PLAYLIST_ID"

# 1. Open
spotify >/dev/null 2>&1 &
# Wait for the player and its window; fail if they never appear.
ready=false
for i in {1..60}; do
    if playerctl -p spotify status >/dev/null 2>&1 &&
       wmctrl -lx | grep -qi 'spotify.Spotify'; then
        ready=true
        break
    fi
    sleep 2
done
[ "$ready" = true ] || exit 1
sleep 5

# 2. Maximise
wmctrl -x -r spotify.Spotify -b add,maximized_vert,maximized_horz
wmctrl -x -a spotify.Spotify
# 3. Select playlist
playerctl -p spotify open "$PLAYLIST"
sleep 5
# 4. Shuffle
playerctl -p spotify shuffle On
# 5. Play
playerctl -p spotify play
EOF
chmod +x ~/.local/bin/realmjukebox.sh

cat > ~/.config/autostart/spotify.desktop <<EOF
[Desktop Entry]
Type=Application
Name=RealmJukebox
Comment=RealmLabs Automatic Jukebox
Exec=$HOME/.local/bin/realmjukebox.sh
Terminal=false
X-GNOME-Autostart-enabled=true
EOF
This is the startup script with an additional readiness timeout guard for readers. The actual commands were tested in the existing session. Opening a playlist does not guarantee that every Spotify version will start playback from that playlist rather than resume its previous context, so verify the selected tracks after a cold boot. No volume or repeat setting is forced. wmctrl works here because Spotify exposes an XWayland window; native Wayland applications may require a different window-management mechanism.
SSH playback control
My first attempt to launch Spotify from SSH with a hardcoded DISPLAY value stalled waiting for the player. For remote playback control, however, there is no need to interact with the graphical display at all. I created this small wrapper, which directs playerctl to Scorpion’s existing D-Bus session. It is intended for the local sudo-enabled administrator:
sudo tee /usr/local/bin/jukebox >/dev/null <<'EOF'
#!/bin/bash
USER_ID=$(id -u scorpion)
exec sudo -H -u scorpion env \
    XDG_RUNTIME_DIR="/run/user/$USER_ID" \
    DBUS_SESSION_BUS_ADDRESS="unix:path=/run/user/$USER_ID/bus" \
    playerctl -p spotify "$@"
EOF
sudo chmod 755 /usr/local/bin/jukebox

jukebox status
jukebox pause
jukebox play
jukebox next
jukebox metadata
Remote control worked. The client must already be running in Scorpion’s session. This opens the door to future Node-RED and Home Assistant integration without needing Spotify Web API credentials for basic local playback commands. Those integrations are ideas, not deployed functionality yet.
10. RealmAgent: Prometheus monitoring without a fixed workstation IP
The next question was whether this workstation could report metrics to NoobSaibot without assigning a static IP or editing the central scrape configuration for each machine. The answer was Prometheus Agent Mode and remote write: Node Exporter is scraped locally, and the agent sends its samples to the Raspberry Pi’s existing Prometheus server.
Node Exporter → local Prometheus Agent → remote write → NoobSaibot Prometheus → Grafana.
The central Prometheus container was already running v3.15.0 with a persistent data mount and 15-day retention. In its Portainer Compose stack I retained every existing flag, bind mount and the SNMP exporter, adding just:
- "--web.enable-remote-write-receiver"After redeployment, I verified the flag using the API:
curl -fsS http://localhost:9090/api/v1/status/flags \
  | python3 -m json.tool | grep remote-write
The returned value for web.enable-remote-write-receiver was true. No new central scrape target was needed.
On the workstation I installed prometheus-node-exporter and prometheus from Debian. The following configuration uses the Prometheus 2.x agent-mode flag supported by the installed package. Check prometheus --version and prometheus --help when reproducing this: Prometheus 3 uses --agent instead.
sudo apt install -y prometheus prometheus-node-exporter
sudo systemctl enable --now prometheus-node-exporter
sudo systemctl stop prometheus

sudo tee /etc/prometheus/realmagent.yml >/dev/null <<'EOF'
global:
  scrape_interval: 30s
scrape_configs:
  - job_name: linux-workstations
    static_configs:
      - targets: ['127.0.0.1:9100']
        labels:
          instance: lamb-dj-deb
remote_write:
  - url: http://PROMETHEUS_SERVER:9090/api/v1/write
EOF

promtool check config /etc/prometheus/realmagent.yml
Replace PROMETHEUS_SERVER with the address of your trusted central receiver. The workstation’s instance label stays stable even when its DHCP address changes. Each workstation needs its own unique label. I then created a systemd override at /etc/systemd/system/prometheus.service.d/realmagent.conf:
[Service]
ExecStart=
ExecStart=/usr/bin/prometheus \
  --config.file=/etc/prometheus/realmagent.yml \
  --enable-feature=agent \
  --storage.agent.path=/var/lib/realmagent \
  --web.listen-address=127.0.0.1:9095
StateDirectory=realmagent
Restart=always
RestartSec=5
sudo systemctl daemon-reload
sudo systemctl enable --now prometheus
sudo journalctl -u prometheus -n 30 --no-pagerOn the Pi, queries for the new instance immediately returned its temperatures, and the metrics appeared in the existing Grafana infrastructure dashboard. No static client address is required. A local write-ahead log buffers samples temporarily when the receiver is unreachable; it is not unlimited offline storage.
Security: this built-in receiver is suitable for a small, trusted homelab, not an unrestricted ingestion service. The plain HTTP receiver accepts writes from devices that can reach it unless separately protected. Do not publish it through Cloudflare or expose it to the internet. Restrict access using network controls or authenticated TLS, and consider binding the local Node Exporter to loopback when nothing else needs to scrape it. These hardening steps were not yet applied in this build.
Grafana queries and the billion-percent memory mistake
My first RAM query accidentally returned available bytes to a percentage gauge. The result was a spectacular 1.64 billion percent! The corrected PromQL matches the available-memory calculation used for the rest of my dashboard:
100 * (1 - (
  node_memory_MemAvailable_bytes{instance="lamb-dj-deb"}
  /
  node_memory_MemTotal_bytes{instance="lamb-dj-deb"}
))
Set the Grafana query to Instant and the unit to Percent (0–100). Other useful queries:
100 - 100 * avg(rate(node_cpu_seconds_total{instance="lamb-dj-deb",mode="idle"}[5m]))

node_hwmon_temp_celsius{instance="lamb-dj-deb",chip="platform_coretemp_0",sensor="temp1"}

up{instance="lamb-dj-deb",job="linux-workstations"}

absent_over_time(up{instance="lamb-dj-deb",job="linux-workstations"}[2m])
The last expression detects missing samples for two minutes. A pushed up metric alone is not sufficient to distinguish an offline workstation from previously received data; missing samples and an explicit zero should both be considered in alert rules. This is a suggested check, not an alert I have deployed.
11. Real-world resource and thermal results
With Spotify playing, the desktop and RDP service active, I measured the Celeron G1840 (two cores at 2.80 GHz). The four interval samples from vmstat showed 4%, 9%, 7% and 5% CPU busy, excluding the first since-boot reading. The following snapshot was recorded before installing the additional Prometheus agent, so it is not a measurement of the agent’s overhead.
| Resource | Measured result |
|---|---|
| CPU utilisation | Approximately 6–7% across the short sample |
| Memory | 2.2 GiB used, 1.6 GiB available (3.7 GiB total) |
| Swap | 0 B used of 3.9 GiB |
| Root filesystem | 5.8 GiB used, 101 GiB available, 6% utilised |
| CPU package | 23°C |
| CPU cores | 21–23°C |
| ACPI sensors | 27.8–29.8°C |
free -h
vmstat 1 5
df -h /
sudo apt install -y lm-sensors
sudo modprobe coretemp
sensors
Those low temperatures are the reported sensor values in a cool environment, not laboratory measurements. The results indicate plenty of headroom for this workload. Spotify’s multiple processes were the largest memory consumers; their resident memory includes shared pages and should not simply be added together.
12. Refreshing the Krypt recovery backup
The final configuration needed four additional allowlisted paths in the backup script, as well as the updated installed-package inventory:
/usr/local/bin/jukebox
/home/[email protected]/.local/bin/realmjukebox.sh
/etc/prometheus/realmagent.yml
/etc/systemd/system/prometheus.service.d/realmagent.conf
Initially I refreshed the backup by copying the newest archive using scp -O -p, restricting its remote permissions and comparing the exact archive’s SHA-256 checksum locally and on Krypt. This procedure was subsequently replaced by the verified one-command backup described below. Synology inherited ACLs still need to be considered.
The revised recovery procedure is: install Debian with GNOME via PXE; set hostname and AD DNS; reinstall required packages and rejoin the domain; verify and restore the configuration archive while the desktop user is logged out; recreate Spotify and RDP access; configure the keyring; enable automatic login and playback; then reboot and verify both RealmJukebox and RealmAgent. The v2 restore helper is intended to cover these additional scripts and service configuration. It does not restore machine credentials, Spotify tokens or keyring contents, and has not been validated with a full clean-install recovery.
13. RealmDrive: bringing Windows Group Policy drive maps to Linux
Just when I thought the project was finished, I decided to tackle one more piece of the Windows experience: centrally managed network drive mappings. I already had a working Group Policy Preferences configuration in Active Directory. Why maintain a second list of shares for Debian?
Windows stores Group Policy Preferences drive mappings in User/Preferences/Drives/Drives.xml under each policy’s SYSVOL directory. SSSD does not automatically turn those entries into Linux desktop bookmarks, but our existing machine-account Kerberos approach gave us a way to retrieve the XML without storing a user’s password.
Discovering the existing policy
From a Windows workstation with the Group Policy PowerShell module installed, I enumerated the drive-mapping XML files and inspected their drive letters, paths, labels, actions and item-level targeting. This also revealed some historic policies that were disabled.
Get-GPO -All | ForEach-Object {
    $Path = "\\order.realm\SYSVOL\order.realm\Policies\{$($_.Id)}\User\Preferences\Drives\Drives.xml"
    if (Test-Path $Path) {
        Write-Host $_.DisplayName
        [xml]$XML = Get-Content -LiteralPath $Path
        foreach ($Drive in $XML.Drives.Drive) {
            [PSCustomObject]@{
                Letter = $Drive.Properties.letter
                Path = $Drive.Properties.path
                Label = $Drive.Properties.label
                Action = $Drive.Properties.action
                Disabled = $Drive.disabled
                Filters = $Drive.Filters.OuterXml
            }
        }
    }
}

Get-GPO -Name "Folder Redirection & Drive Maps" |
    Select-Object DisplayName, Id, GpoStatus
The consolidated Folder Redirection & Drive Maps policy was enabled, while the older Scorpion-specific policy was disabled. I selected only the consolidated policy for the Linux importer. Do not import every XML file from SYSVOL: some are disabled, linked to other OUs or intended for other users. Use Group Policy Management and, where available, gpresult /r /scope user to establish which policies actually apply.
Reading SYSVOL with the computer’s identity
On the Debian workstation I tested the same temporary Kerberos cache technique used for RealmWallpaper. Replace the example policy GUID with the ID of the approved policy in your own domain, including its braces.
sudo bash <<'EOF'
set -e
CACHE=$(mktemp -d /run/realmdrive.XXXXXX)
export KRB5CCNAME="FILE:$CACHE/ccache"
trap 'rm -rf "$CACHE"' EXIT

kinit -k -t /etc/krb5.keytab '[email protected]'
cd "$CACHE"

smbclient //seido.order.realm/SYSVOL \
  --use-krb5-ccache="$KRB5CCNAME" \
  -c 'cd order.realm/Policies/{YOUR-GPO-GUID}/User/Preferences/Drives; get Drives.xml'

python3 - <<'PY'
import xml.etree.ElementTree as ET
for drive in ET.parse("Drives.xml").getroot().findall("Drive"):
    p = drive.find("Properties")
    print(p.get("letter"), p.get("label"), p.get("path"))
PY
EOF

id scorpion
getent group admins
The machine successfully retrieved the XML. The domain group lookup confirmed that Scorpion was not in the Admins group, so the administrator-only shares should not be presented to him. I then created /usr/local/bin/realmdrive, a Python helper with two modes:
- sync: running as root, obtain a temporary machine ticket, download only the approved GPO XML, evaluate the supported targeting conditions against the target AD user and NSS group membership, and write an atomic root-owned cache in
/var/lib/realmdrive/. - apply: running as the logged-in user, merge the approved SMB locations into
~/.config/gtk-3.0/bookmarks, replacing only previously managed entries and preserving personal bookmarks.
The importer supports enabled Create, Update and Replace entries with no filters, or positive AND combinations of AD FilterUser and FilterGroup conditions. It compares the configured domain and short account/group names, not SIDs. It rejects unsupported filter types, negative and OR conditions, local-group and primary-group tests, and paths outside the approved NAS. It percent-encodes spaces in SMB URIs. This is a deliberately small subset of GPP, not a complete GPO processing engine. In particular, it does not evaluate policy links, precedence, security filtering or later changes to the policy’s enabled status. The configured user and GPO are explicitly selected for this workstation.
sudo apt install -y gvfs-backends smbclient
sudo install -d -m 755 /var/lib/realmdrive
sudo realmdrive sync
sudo -H -u scorpion realmdrive apply
The resulting bookmarks were:
smb://seido.order.realm/Krypt B: Krypt [Orderrealm]
smb://seido.order.realm/Scorpion H: Scorpion [Orderrealm]
smb://seido.order.realm/The%20Nexus X: The Nexus [Orderrealm]
All three appeared in GNOME Files, the existing Documents, Music, Pictures, Videos and Downloads bookmarks were preserved, and the share-access test worked. The administrator-only locations and other personal drives were excluded from the generated bookmarks.
Automatic refresh at startup
The root synchronisation service retrieves the policy before the display manager starts. A GNOME autostart entry applies the cached bookmarks in the user’s own session. Here is /etc/systemd/system/realmdrive.service:
[Unit]
Description=RealmDrive GPO Synchronisation
Wants=network-online.target
After=network-online.target sssd.service
Before=display-manager.service

[Service]
Type=oneshot
ExecStart=/usr/local/bin/realmdrive sync
TimeoutStartSec=60
UMask=0077

[Install]
WantedBy=multi-user.target
And /etc/xdg/autostart/realmdrive.desktop:
[Desktop Entry]
Type=Application
Name=RealmDrive
Comment=Orderrealm Group Policy Drive Maps
Exec=/usr/local/bin/realmdrive apply
OnlyShowIn=GNOME;
Terminal=false
X-GNOME-Autostart-enabled=true
sudo systemctl daemon-reload
sudo systemctl enable --now realmdrive.service
# Refresh the mappings without rebooting:
sudo systemctl start realmdrive.service
sudo -H -u scorpion realmdrive applySecurity boundary: the machine account reads policy metadata only. GNOME connects to the actual shares as the user, and the NAS continues to enforce its own permissions. Bookmarks are not permanent CIFS filesystem mounts or an access-control mechanism. Automatic login does not issue a personal Kerberos ticket, so the user may be asked for SMB credentials. I avoid saving the AD password permanently, particularly because this jukebox’s local keyring is unencrypted.
With RealmWallpaper and RealmDrive, the existing Windows policies now provide the source material for both operating systems, without duplicating the wallpaper or drive mapping configuration.
14. RealmBackup: the entire configuration in one command
After all the additions, I wanted a simple way to refresh the recovery archive without remembering a string of commands. The goal was a single word from the local administrator’s SSH session:
backupFirst I added the RealmDrive files to the existing backup allowlist alongside RealmJukebox and RealmAgent:
for FILE in \
    /usr/local/bin/realmdrive \
    /etc/systemd/system/realmdrive.service \
    /etc/xdg/autostart/realmdrive.desktop
do
    if ! sudo grep -Fxq "    $FILE" /usr/local/sbin/lamb-dj-backup; then
        sudo sed -i "\\|/usr/local/sbin/lamb-dj-backup$|a\\    $FILE" \
            /usr/local/sbin/lamb-dj-backup
    fi
done
sudo bash -n /usr/local/sbin/lamb-dj-backup
I installed a wrapper at /usr/local/bin/backup. It runs the existing archive generator, identifies the exact archive produced in that invocation, calculates SHA-256 and streams the archive over one SSH connection to a temporary file on Krypt. The remote side validates the checksum before renaming the temporary file to its final name. This avoids SFTP entirely and does not leave a completed-looking archive after a failed transfer. Older backups and the local copy are retained.
The wrapper below shows the final SSH-key-enabled implementation. Adapt the NAS account and hostname to your environment. The account must be authorised to create files in the backup directory. The local archive generator should output its checksum and absolute archive path as described earlier.
#!/bin/bash
set -euo pipefail

NAS="NAS_USER@NAS_HOST"
DEST="/volume1/Krypt/LAMB-DJ-DEB/Backups"

LOG=$(mktemp)
trap 'rm -f "$LOG"' EXIT

sudo /usr/local/sbin/lamb-dj-backup | tee "$LOG"

BACKUP=$(awk '
    length($1)==64 &&
    $2 ~ /^\\/var\\/tmp\\/lamb-dj-deb-recovery-[0-9]+-[0-9]+\\.tar\\.gz$/ {
        print $2
    }
' "$LOG" | tail -1)

[[ -f "$BACKUP" ]] || { echo "Backup not found"; exit 1; }

NAME=$(basename "$BACKUP")
HASH=$(sha256sum "$BACKUP" | awk '{print $1}')

REMOTE=$(cat <<'SH'
set -eu
umask 077

dest=$1
name=$2
expected=$3

mkdir -p "$dest"
tmp=$(mktemp "$dest/.backup.XXXXXX")
trap 'rm -f "$tmp"' 0

cat > "$tmp"
chmod 600 "$tmp"

actual=$(sha256sum "$tmp")
actual=${actual%% *}

if [ "$actual" != "$expected" ]; then
    echo "ERROR: Checksum mismatch"
    exit 1
fi

mv "$tmp" "$dest/$name"
echo "Checksum verified: $actual"
ls -lh "$dest/$name"
SH
)

ssh -i "$HOME/.ssh/seido-backup" \
    -o IdentitiesOnly=yes -o BatchMode=yes \
    "$NAS" "set -- '$DEST' '$NAME' '$HASH'; $REMOTE" < "$BACKUP"

echo "BACKUP SUCCESSFUL - FLAWLESS VICTORY"
Save that as /usr/local/bin/backup, owned by root, with mode 0755. Run it as the normal local administrator rather than with sudo; the wrapper calls sudo only for the local archive generation. The first complete one-command backup succeeded.
Removing the Seido password prompt without storing a password
Instead of embedding an encrypted NAS password and having to store its decryption secret somewhere, I generated a dedicated, passphrase-protected SSH key on the workstation:
ssh-keygen -t rsa -b 3072 \
  -f ~/.ssh/seido-backup \
  -C "LAMB-DJ-DEB Krypt Backup"

ssh-copy-id -i ~/.ssh/seido-backup.pub NAS_USER@NAS_HOST

eval "$(ssh-agent -s)"
ssh-add -t 8h ~/.ssh/seido-backup
The private key is encrypted on disk. The SSH agent holds the unlocked identity for a limited time. The public key is installed on Seido; neither the NAS password nor the private key passphrase appears in the backup script.
Initially, key authentication failed with Permission denied (publickey,password). The fingerprints from the local public key and the NAS’s authorized_keys file matched. Password-based SSH still worked, so the next thing to inspect was the NAS file permissions.
# Run on the NAS after signing in with the existing password:
ls -ld "$HOME" ~/.ssh ~/.ssh/authorized_keys
ssh-keygen -lf ~/.ssh/authorized_keys
All three locations had mode 0777, with Synology ACLs indicated by a trailing plus sign. OpenSSH’s StrictModes checks were rejecting the overly writable files and directories. I changed only the account’s home directory and the two SSH locations:
chmod 700 "$HOME"
chmod 700 ~/.ssh
chmod 600 ~/.ssh/authorized_keys
Do not apply these commands recursively to the entire homes shared folder or disable StrictModes. Check effective DSM ACLs if the problem persists. After correcting the permissions, key authentication worked.
# Back on the Debian workstation:
ssh -i ~/.ssh/seido-backup \
  -o IdentitiesOnly=yes -o BatchMode=yes \
  NAS_USER@NAS_HOST 'echo "Seido authenticated"'

backup
The key is passphrase-protected, not a fully unattended backup credential. A new SSH session may need its own agent or access to an existing one; sudo can also prompt separately. The key currently authenticates as a NAS administrator, so a dedicated least-privilege account or a carefully restricted backup-only SSH key is preferable before automating scheduled backups. The archive’s file mode is restricted, but the archive itself is not encrypted at rest. Synology share ACLs and backup storage access still need to be reviewed.
The final recovery archive generator includes the RealmDrive configuration. The existing v2 restore helper predates RealmDrive and the new backup wrapper, however. Those files and the backup SSH key setup must be restored or recreated separately until a further revision of the recovery helper is prepared. The private key is deliberately not included in the archive. A successful backup and checksum verification are not a substitute for a full restore test.
The result
At idle, the initial GNOME desktop used just 749 MiB of RAM. After starting Spotify, SSSD and the native RDP server, the machine reported 1.4 GiB used out of 3.7 GiB available to the OS, with 2.3 GiB available and no swap in use. These are snapshots from this particular machine, not a formal Windows/Linux benchmark.
The older Celeron is now a useful, centrally managed Debian music workstation. PXE deployment, AD authentication, central wallpapers, Spotify, desktop sharing, SSH playback control and push-based monitoring all form part of the build. Interactive RDP after automatic login was confirmed following the keyring fix. The custom playlist startup sequence still deserves a complete cold-boot playback test.
I also deferred the available Secure Boot certificate and revocation database updates because Secure Boot is disabled and the machine has already exhibited a UEFI variable compatibility issue. Those updates are not BIOS or SSD firmware upgrades. Normal OS security updates remain important.
Remaining work includes tightening SSSD login authorisation, reviewing the NAS computer-account permissions, restricting monitoring endpoints, extending the restore helper to cover RealmDrive and the backup wrapper, and performing a full recovery test. For this single-purpose machine, Debian has surpassed my previous Windows setup: it is now a remotely programmable music appliance with a supported OS and plenty of hardware headroom. That does not make Linux universally better than Windows; it makes it a better fit for this particular job.
Konnect. Select. Deploy. Play.