


I already use MQTT extensively around RealmLabs for Home Assistant, ESP32 devices and model lighting, but my KITT-inspired voice project created a slightly different problem. I did not just need lightweight state messages — I needed a reliable way to hand a text-to-speech job from one server to another, queue it if the TTS service was busy, and know that a worker had actually picked it up.
That is where RabbitMQ fitted in. Rather than replacing MQTT, I added it alongside Mosquitto and gave each system a different job: MQTT remains my lightweight automation and device messaging layer, while RabbitMQ now handles application-style work queues such as KITT TTS generation.
The Problem I Wanted to Solve
The KITT stack is split across several Proxmox containers. KITT-AI handles the local AI side, while a separate TTS server runs the Piper voice models for KITT and KARR. Originally, the web dashboard could call the TTS service directly, but I wanted the backend to be more resilient and less tightly coupled.
The goal was simple: KITT-AI should be able to submit a TTS request and move on. RabbitMQ should hold the job until the TTS worker is ready, and the worker should consume the job and generate the WAV file.
KITT-AI (LXC 108)
        |
        |  TTS request
        v
RabbitMQ (LXC 103)
        |
        |  vhost: /kitt
        |  exchange: kitt
        |  routing key: tts
        v
Queue: tts
        |
        v
TTSServer (LXC 106)
        |
        |  kitt-rabbit-worker
        v
Piper KITT / KARR
        |
        v
Generated WAV
Why RabbitMQ Instead of More MQTT?
MQTT is still ideal for most of my home automation. It is lightweight, fast and works extremely well for things such as ESP32 lighting controllers, Home Assistant state changes and Node-RED flows. I documented that side of the lab in Centralising Homelab Messaging: Mosquitto MQTT on Synology.
TTS generation is different. It behaves more like a job: a request is submitted, one worker should process it, and the job should remain queued until it is consumed. RabbitMQ gives me that queue-and-worker model cleanly without forcing the TTS server and KITT-AI server to depend directly on one another.
RabbitMQ LXC on Proxmox
I created a dedicated RabbitMQ LXC on my Proxmox host rather than installing RabbitMQ directly on either the AI or TTS container. In my lab the container is LXC 103, running Debian, with a static address of 192.168.68.42.
Keeping RabbitMQ separate makes the messaging layer independent of both endpoints. I can restart or rebuild the KITT-AI or TTS containers without moving the broker.
systemctl status rabbitmq-serverOnce the service was running, I used the RabbitMQ management interface to check the broker and later verify the exchange, queue and binding visually.
Creating the KITT Virtual Host and User
I gave the KITT services their own RabbitMQ virtual host called /kitt. This keeps the KITT messaging topology isolated from anything else I may add to the broker later.
rabbitmqctl add_vhost /kitt
rabbitmqctl add_user kitt CHANGE_THIS_PASSWORD
rabbitmqctl set_permissions -p /kitt kitt ".*" ".*" ".*"
The password above is deliberately a placeholder. I used a dedicated RabbitMQ account for the application rather than having the worker connect as the built-in guest user.
Exchange, Queue and Routing Key
The TTS topology is deliberately small. I created a direct exchange named kitt, a queue named tts, and bound the queue to the exchange with the routing key tts.
Virtual host: /kitt
Exchange:     kitt
Type:         direct

Queue:        tts
Routing key:  tts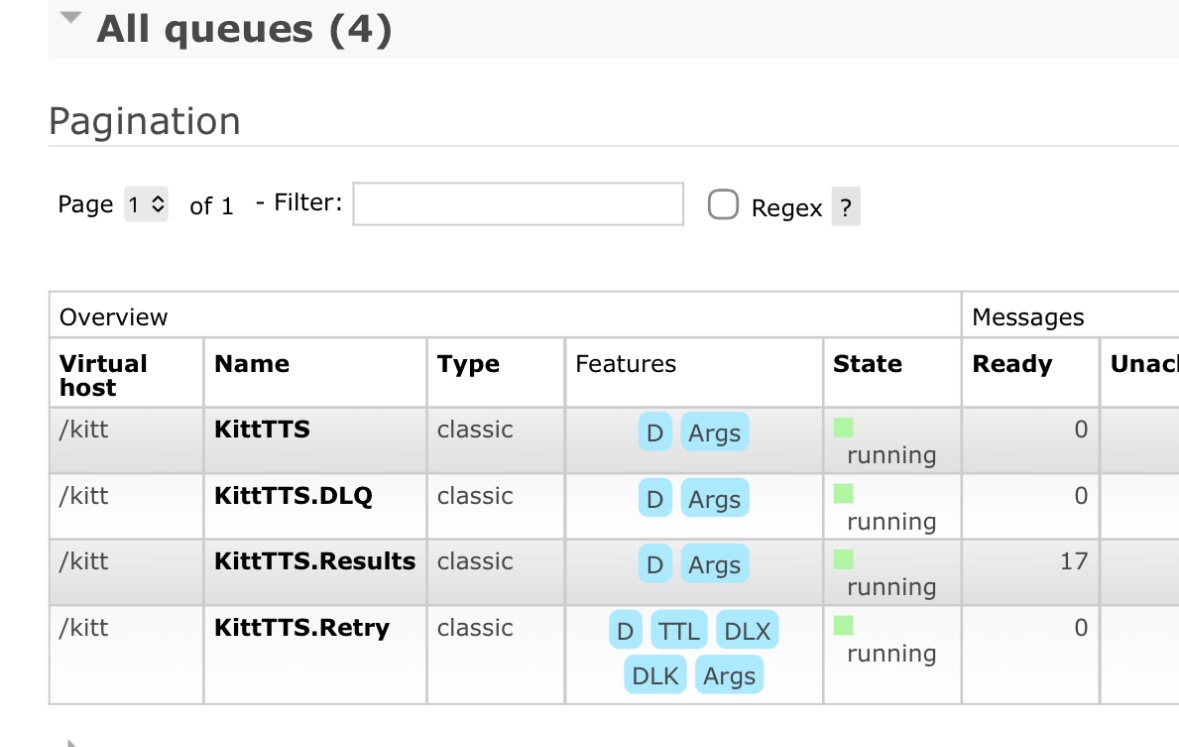
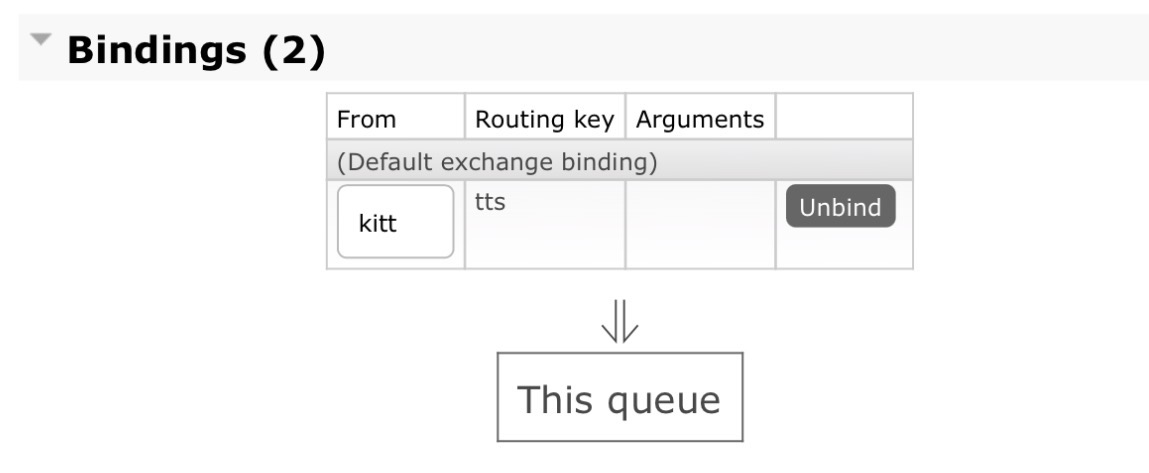
tts queue binding and routing key.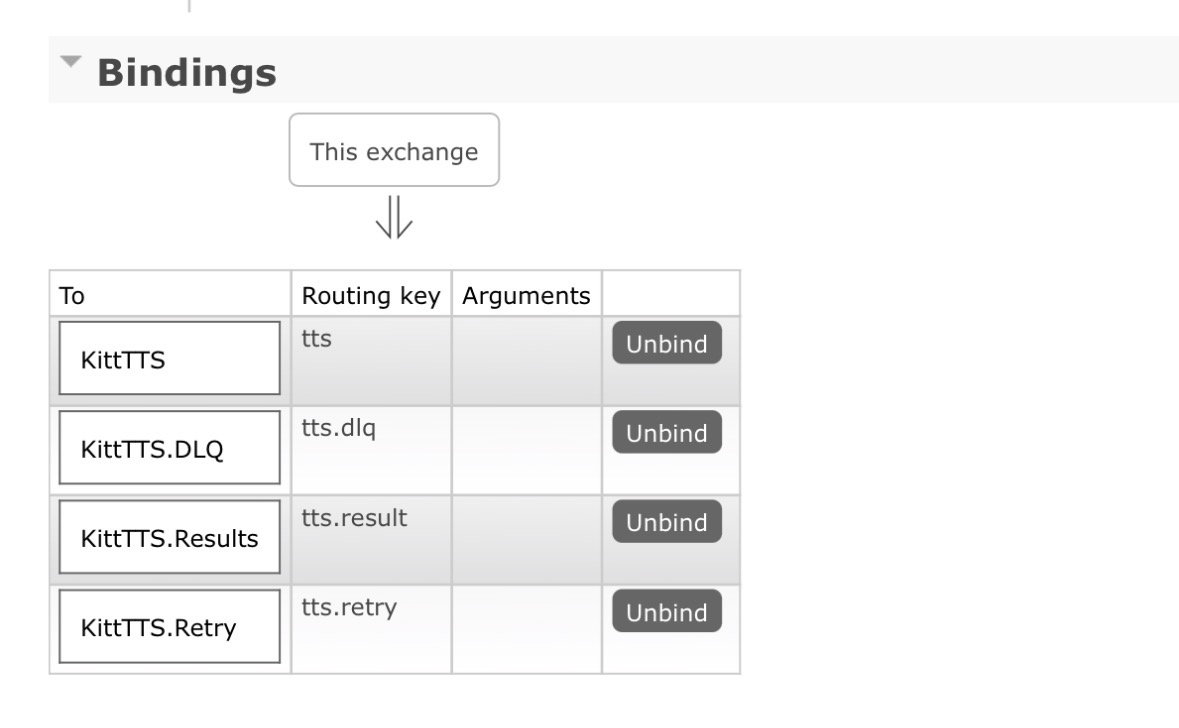
This means a producer publishes a message to the kitt exchange using the tts routing key. RabbitMQ then routes that message into the tts queue for the TTS worker to consume.
Testing the RabbitMQ Route
Before adding any Python code, I used the management interface to publish a test message through the exchange. That let me prove the exchange, queue and routing key were correct independently of the KITT application.
This was a useful troubleshooting step because an earlier queue/binding attempt did not behave as expected. Once the topology was reduced to the direct kitt exchange, tts queue and tts routing key, the test publish arrived correctly.
Building the TTS Worker
The consumer lives on TTSServer, LXC 106. Its job is to connect to RabbitMQ, wait for TTS requests and hand the text to the existing Piper-based KITT/KARR voice service.
Because modern Debian protects the system Python environment, I created a dedicated virtual environment instead of installing the RabbitMQ Python dependency globally.
python3 -m venv /opt/kitt-rabbit-venv
/opt/kitt-rabbit-venv/bin/pip install pika
The worker itself lives at:
/opt/kitt-rabbit-worker.pyGenerated audio is written under:
/opt/kitt-audioRunning the Worker with systemd
I wanted the consumer to behave like part of the server rather than something I had to launch manually, so I wrapped it in a systemd service called kitt-rabbit-worker.service.
systemctl daemon-reload
systemctl enable --now kitt-rabbit-worker.service
systemctl status kitt-rabbit-worker.service
Once running, the service sits waiting for TTS messages. A successful test looked like this:
Waiting for KITT TTS messages...

[REQUEST] id=test-002
[COMPLETE] file=/opt/kitt-audio/kitt-1789765648-test-002.wav
At that point the RabbitMQ plumbing was doing exactly what I wanted: accept the request, queue it, allow the worker to consume it and generate the final WAV file.
Where This Fits into the KITT Project
The wider project is documented in Building a Voice-Activated KITT Smart Home Dashboard with Piper TTS, Home Assistant and Local AI. RabbitMQ now sits between the AI/application layer and the dedicated TTS server.
The important part is that neither the HTML dashboard nor the Android app needs to understand the internals of Piper. They can submit a request through the application backend, and the backend can hand the TTS job to RabbitMQ.
RabbitMQ and MQTT Now Have Different Jobs
I am not replacing Mosquitto. Both brokers now have a clear role in the homelab:
MQTT
- Home Assistant
- ESP32 devices
- Node-RED
- model lighting
- state and control messages

RabbitMQ
- application jobs
- KITT TTS requests
- worker queueing
- reliable producer/consumer handoff
That split makes more sense than trying to force every message in the lab through one technology simply because it is already installed.
What Comes Next
With the TTS queue working, the next stage is not more RabbitMQ configuration. I can now finish the Android dashboard plumbing and make sure the HTML and Android versions use the same backend reliably. After that, the next major phase is the listening side: microphone input, wake-word detection, speech-to-text and feeding recognised speech into the same KITT request pipeline.
That is exactly what I wanted from this change. RabbitMQ is now infrastructure rather than something the front end has to care about.